Showing posts with label Crafts. Show all posts

Thursday, 31 December 2015

New Years Eve {A last and quick DIY, because...well it's me}

So, it's nearly nearly New Years and I have to hurry because my amazing boyfriend is getting the food ready in the kitchen but this has to be done before the New Years starts! ;)

I'm normally in love with technology. Without my phone, I'd be lost. But when it comes to organising and scheduling my weeks it has to be paper for me.
I started with my calenders some when back 2010 (and I still have them all...I just need to figure out which box they're in...). Back then I used pre-made (aka: normal calenders) and just kept my cover self-designed (plus the whole, picture, tickets, bum wrappings and whatever you can think of that I put inside). But now, I guess since 2012 I'm making my own calenders. The plus: They are exactly how I need them AND: they are only for half a year. That's around the time when I need a change. So half-a-year-calenders it is.

I thought, since my new one starts on Monday, I'll post a quick DIY so you can grab a simple notebook just before that and make your own. It's easy! And so convenient and fun!!

You'll need:


  • notebook
  • pens to draw the dividers
  • masking tape (just because masking tape makes about everything better and cuter!!)
  • one empty envelope

As a first thing, I normally start with my weekly design:

Since I love to doodle and I'm totally addicted to my To-Do Lists, I leave one page empty for that and the other page for weekly appointments. You could go squares all along, or just bars...or bubbles. Whatever suits you best.

After that I add an empty envelope to the last page. It comes in really handy for collecting cards, stickers, post stamps etc.!


And I normally leave a few pages empty at the end for notes, scribbles, whatever. It's also where I keep all my lists. Bucket list, work-on-yourself list, budget list, 2016-list....I've got them all!!!


This half-a-years calender is way cuter then usual. I normally go for plain blank but I discovered this cute one at the Design Market we went to in October and just HAD to. The envelope is from there as well. Along with a lot of cute paper that still awaits its destiny!

The book is already filled with a few cute sketches and a year-overview. The rest will be filled by me ;)

My boyfriend just came jumping into my room carrying a sparkler. I guess its a hint that it's time for me to go ;)

Btw: That's the girl I bought all the stuff from:


Happy Happy Happy New Year!!!

Sorry for any typos. I'm in a hurry ;P

Monday, 16 November 2015

How to color much more with chalk than just the streets

I've been looking a lot into hair-dyeing options recently and so it happened that two weeks ago I ended up receiving the delivery of one package of hair chalk in all kind of colours imaginable.

If you haven't heard of hair chalk yet, it's pretty much what the name suggests: Chalk for your hair. The chalk is a non-oil based artist chalk which also can be used for normal drawings. I haven't really figured out if the hair chalk is different to the artists chalk, but from what I read, it's just the name that makes the difference.

See!? Normal pastel chalk ;)
Anyway.
I'm one pf those persons who processes life things through her hair. This way I already dyed my hair purple, red, dark brown, black and, most recently, blond. The fact that my hair is this undefinable brown-ish colour also helps a great deal ;)
Hair chalk pretty much does to your hair what any normal hair dye would. Except that it’s not permanent. Just as you would paint a picture, you’ll have to wet the parts of your hair you want to dye with water, rub chalk into them until you get the preferred colour and seal the finished product with either a flat iron or by blow-drying your hair. The colour will stay for one to two days, and simply comes off the next time you wash your hair.

...that's at least what I guessed. It turned out all right ;)


What I've learnt:
- It really is as easy as it sounds. You won't have to take extreme care of your hands or stains in general (though that's a guess, I didn't have stains) because the colour washes of easily!
- I didn't use a blow dryer or flat-iron and my colour came out really fast. Maybe it would be good to try those.
- Your hair will become super dry. As in really really dry! Also it's hard to comb. So it is fun to use the chalk once or twice but I definitely wouldn't do it too often. (Though as a plus: Your hair is only dry as long as the colour is in!)

And that's pretty much it!! (Btw: This is the package of chalk I bought, and with which I was pretty happy!)

At the end, I liked the blue so much, I went to the hair dresser and got it dyed properly....so that might be a side effect ;)
Have fun!!


..oh also: My article about hair chalk is also here! Go check their page out, it's pretty fun :)

Monday, 7 July 2014

Mobile case makeover {An easy Anthropologie hack}

Hey there!
I'm really starting to tun out of appropriate mobile case makeover titles. Here, the Anthropologie part definitely did save me, but we'll see how we do in the future ;)
Anyways, recently I did some eye-shopping over at Anthropologies. I love that shop, but sadly, even the sale prices are too expensive for me, so we'll just keep looking at stuff. However, I stumbled upon this:

source
and, right next to me was:


...my phone case. With it's bare and transparent skin (which already started to be a bit dodgy....sorry). It was basically screaming for me to stop studying and help it out of its misery. And that's exactly what I did.


Much, much better right?!
In case you want to hop on the train, all you'll need is:

  • a bare white/transparent/really any colour works phone case
  • nail polish (it might be helpful to be a bit crazy over nail polish as I am, since that will leave you with a huge variety to choose from)
Let's get started!


Pretty much all I did was, to paint my way "to the top". I started with three base/ground colours and kept applying layer after layer, vaguely following the picture of the finished mobile case.


I used two different types of yellow to give more depth to the inside of the flowers. Also, not having all the right colours (jep. Not even me!) I kind of started mixing and matching a bit more at the end. Another idea would be, to start off with a entirely different colour pallet right from the beginning.

And that's it!
All my nail polishes were 'normal' sized brushes, so nothing special. It really works well if you try to 'flatten' them a bit while brushing off the surplus of paint. Let it dry, and you are done!
I really couldn't be happier with the end result!! (Happily running around campus with a flowery mobile case now ;) )


Monday, 12 May 2014

Hey there!

I haven't been on my blog for ages, I know! And to be a 100% honest, I was just hoping by having kind of an sentimental look at all that had happened and what I had wrote, when I suddenly stumbled upon a couple of comments! Like. Real life comments. Ok so, most of the time writing here feels a bit lonely. It is this, a bit, one sided kind of conversation I seem to have with myself. But when I saw those comments, I was seriously baffled. Seeing that someone actually goes through the things I write and....likes them? I know I shouldn't doubt myself as much as it sounds I do right now, but we are all humans right?! ;) This whole self-doubt-things seems to be quite a thing.

Anyways, so as to a few other requests of friends lately, I might just bring on a few updates on this small space of mine. And a little DIY-Inspiration for you at the end if you make it through this post ;)

Before this all gets too sunny, shiny and all kinds of emotional, let me just give a short burst of complaint:
SERIOUSLY? Who ever said that those uni years were the best of your life?! Seriously? I have no nada niente time and also seem to have a decreasing social life where I actually start to count a lunch conversation as a social activity! Like: "Give yourself a pad on the shoulder! You were social today!"-kind of. Gnhhh.

Ok. Back to an a bit more optimistic approached. What have you guys been missing out on?
 
The last pictures of my last post (so many lasts, whups!) show Augsburg in full bloom....by now we have went on to achieve the rain forest state. Literally. It is rainy and grey most of the time and things just are green! But I'm really loving this. Before that though, we had some really amazing sunny and warm weather! (Open windows in the whole apartment kind of warm!)
Though....that's what my life has been like. No change what so ever....
Though I have to admit that studying at uni like this had its perks
Than, somewhere in the middle of this all, this cute girl came to visit me!!! Two years since the last time we saw each other. Talk of crazy facts!!! (This is us, btw, following our absolute, infinite and crazy love for everything printed...also known as books)
But, we do not just love books...we also both love to be creative, so I had no trouble at all to convince her that a lazy creative and talkative day was all we two needed. Also: I finished my tattoo extension design!!! Though, until the actual "due" day, the design will be kept a secret here on the Internet ;)
Of course, there was some sightseeing of our beautiful little city included...
And one crazy pizza night....can you see me and that pizza? I ate it all! Tschaka!
Also, I got a job again last month. So I'm back to being a waitress. This was me having a quick lunch in between courses and work
Guess who was hanging up stuff around campus ;)
I also got all my diaries, schedules, notebooks and what else there is I have been filling the last couple of years organised. Whozza! I really need to stop doing that or find a bigger apartment to fill them with one day. Though I also have to admit, it's fun to look at them. That was my week at Paris right after I graduated high school (Goofy girl)
To remind me why exactly I'm making my life extra stressful...
And that is one of our more crazy classes....can you tell. Great board work, really.
Btw, what was wrong back than, when math used to include numbers?! Not that I liked it much more, but honestly....this?
I also tried Yoga outdoors (which I loved), my hair is noticeably growing longer (well, noticeable to me), I died it again...darker and I started watching Grey's Anatomy which I Love (capital L love that is!) though I haven't given up my love for Game of Thrones either of course ;)
And that's it. We're nearly at the end, which brings us to a little idea I thought I might just share with you, since we are dumping all kind of news and updates here anyway. 
So, since I wasn't blogging so much lately, but I still had to keep a record of my food (and find an outlet of my crazy love of taking pictures of food), this is what happened:

A friend of mine gave me a little recipe book as a present, after a few little makeovers this is what we ended up with. And I'm loving it!


Mainly: I cut out and renamed a few sections I thought were unnecessary (like "meat"...which got changed to "mains"...btw note: "mains" can of course include things for meat. I'm simply pretty sure that I would have never filled a section with "meat"). I changed the cover and back by simply adding photos I had printed and applied them with masking tape.
And than I filled it (and am in the process of, for the next years) with recipes...and pictures, and scribbles and more masking tape of course ;)
What do you think? It is a bit like a portable food blog on paper!!

So that's me with a crazy amount of updates. Now I'm going to focus on my much neglected amount of uni-work and wish you all a wonderful start into the week!!

...oh and I'll try to be a bit more active around here, though we all know how much a students promise is worth these days ;P

Wednesday, 19 March 2014

You never have too many phone cases!


It's funny how this one never made it up on the blog. But than again, it's only logical, because there were exams, and than there was life, and moods...and just about everything else that could have probably gotten into the way of me publishing this post and after all....it's not like I already have posted about a billion different mobile phone cases DIY's, right?! It just never gets boring ;)

So the procedure is the same as always, grab a plain white (blue, black, green, whatever) mobile case, this time, also grab some tape, some nail polish and get creative!!


And simple as that, you'll get another beautiful fun mobile case....


The real bummer is that meanwhile my phone died (more or less) and I got a new one...so now, I have tons of cute cases but I can't use them anymore!!! (I'm sorry, first world problems. I know. But it is kind of a bummer...so right now we're sticking to plain transparent).

Wednesday, 22 January 2014

There is no such thing as too many bracelets

Wouldn't you agree?!
I simply love bracelets! Huge ones, big ones, sparkly, plain, colourful, just thread, neon....there is no end to them. And because They are so easy to make, I thought I might give you a wrist-ful of DIY ideas ;)


Starting from the bottom left to the top right:

  • I made that one, one or two years ago and it's still one of my favourites. You can do it with loop pearls, normal ones, big tiny...the possibilities are endless. I had another one, black leather threads and silver pearls but it sadly broke. I really need to fix it!!
  •  The next one is a good old friendship bracelets. I think it was the first one I ever made. They are quite time consuming but so worth the effort (and SO many possibilities!!!!!) ;)
  •  That one is a present from my mum. She bought it from me so I could copy the technique. Remember those funny scoobidoos? It's exactly that except a stone woven in between and way smaller threads!
  • The next one if bought, though a similar look would be this one (I really need to buy leather bands!)
  •  The big beads ones are all self made (except one, which comes from here. Gorgeous stuff!). But those are so easy, they don't really need an instruction. The only thing which I started to change is, to look out more for what kind of material I'm using (which is actually really exciting to think about!). So those were: lotus seeds, volcanic stones, jade and wooden pearls from Tibet. 
  • And the black one with the angle wing on it is this technique used with a Thomas Sabo carrier (because I never really were it on my necklace) and the charm is a gift from my mum.


Another tip, I also started using my Pandora charms to add something to otherwise really simple bracelets. I love that hint of silver in my end products and it really makes them something special!! 
That necklace came as just the upper design (so wooden pearls and turquoise). I bought additional jade beads and added some of my Pandora charms. I also made a matching bracelets with the beads I had left over at the end. It is one of my favourite and most used necklaces and bracelets! (Which explains why it also shows up in my header ;) )

Have fun getting creative ;)

Friday, 8 November 2013

My room {An update and DIY!}

I'm just in between my early lunch (muesli. Sorry. It's one of those days) and getting my laundry up as well as heading to university right after that. Phew. Thursdays are my productive days...and my math days (which kind of gives every Thursday an underlining threat....but I'm determined to not give up!).
And because I haven't really figured out a way to organise all of my upcoming food posts, we'll go with a little update from my room first (and seriously, I had that planned for two weeks now, so it might just be the time for that as well!)
Well, that was yesterday. Today I'm all sore and beaten up from my martial arts training (but it sure is fun!!) and just about to start with my Portuguese. (After I cleaned up the room and the kitchen. AND! had the first coffee with my extraordinary amazing coffee machine!!!)

And because I know you're all just as stoked about that as I am...here is even a little video about it! Ha!
(This can also be found on my instagram account)


And now, look at this beauty of a first coffee (and that cute anthropology mug!!! Still in love with it)!

Ok. Now since we have cleared that, I actually have something else to talk about.
As promised my room would change quite a bit after my first update all the way back when I moved in here.
So now, even though they are still going to be smaller changes, I feel pretty confident that this is "my" room for the next time. And because I'm such a nice person (over enthusiastic cough) I'm not just going to share my coffee with you, but also this little room update ;) (careful photo overload!):

The general "first" impression
Lots and lots of greens...but the amount is probably only cause by my knowledge that in two month...only half of it will still be there. My and my so not green thumb. Sight.
I printed some of the prints from my pinterest board (this one) in exchange for some of the picture, which got removed. I really like this one! (Link
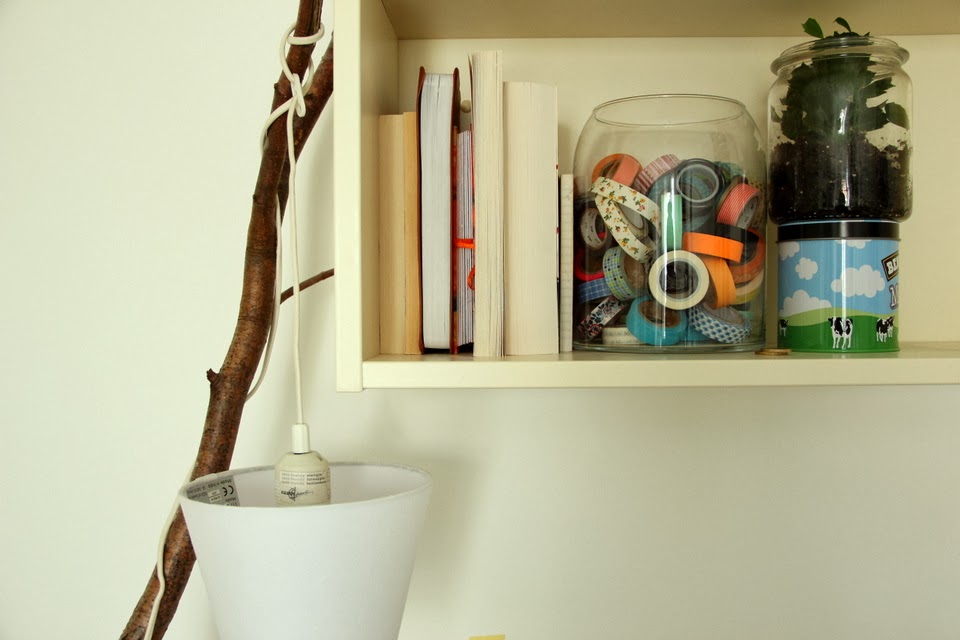
The inspiration for that "stick lamp" comes from the "COUCH" magazine (which I love!) If you would write a tutorial for it, it would pretty much be: Grab a stick from the woods, carry it home, wrap your lamp around it. And you're done!!!! (well, the really weird part is carrying those sticks out of the wood and home. You should have seen the stares I got. Haha, well I guess I don't mind breaking up their daily boring routine a bit ;) )
BUT, I also used the "stick method" to create a holder for my mirror! Remember how I mentioned that my wall is solid concrete? Well, it turned out that the self-adhesive hooks I bought couldn't really handle what I wanted them to handle, and since I still don't own or am capable of using (though that might be up to discussion) a power drill, I needed to find a different solution.
For the stick-mirror: Simply drill two holes into your sticks (at the height of where you want to hang your mirror). Insert two hooks (one for each stick). And now, (my mirror has a wire strand at its back, if you don't have one, apply one) and hang the mirror on! They'll lean pretty stable by themselves on your wall, though I'm sure you'll be able to somehow come up with an idea how to make that even more secure (...in case you can drill holes and hooks into your wall that is. I'm fine with what I have now ;) ).
I like F's....friends, family, food, France, fun, favourite, fearless....

It feels more and more like home. And with that I'm off to learn more Portuguese words and head into an amazing weekend afterwards, seeing one of my best best best best friends for the first time after my move. Yay! ;D