Showing posts with label Sweets. Show all posts

Wednesday, 30 July 2014

A walk back in history {or how I started baking}

Let's talk cake.
I sometimes try to remember when my baking addiction started. Admittedly, I haven't come up with something yet. But I like to think that it was all the way back, when I made my first cake out in our garden.

Back than, my brothers and I love to pretend we were living outside in out own cave (we had built one inside our neighbours trees....cough). Anyway, as a truly outside living person I had to make dinner for us, right? So while I was happily baking/cooking/mud-ing away I was suddenly facing the question: Why not steal inside and get real ingredients outside?! (I had to mull it over a bit, because I wasn't quiet sure if cave man have had flour back than, but than again, you were allowed to use what you had, right? And after all, some hunting and sneaking had to be done in order to get my game (aka: flour, sugar and salt)).

I had a rough idea about how to bake, at least I had seen my mother several times, throwing stuff into a bowl. So out there, in our cave, I recreated what I thought was a cake. The fact that it also had dirt, common daisies and grass in it, just made it even more appealing.
To shorten this whole story, I could convince my mum to actually bake my concoction and after I had applied a generous amount of chocolate to the top the whole family ate it together (they never found out about the grass, daisy and dirt part).

Several years later I still love to make messes bake, though I might have given up on the grass and dirt ;)
So, when I heard that my mum was having a slightly larger birthday crowd, I easily talked her into letting me tend to the cake part. How much I love her ;)

After a short facebook discussion, I came up with those two beauties:

The first one is a Chocolate Mousse Cake by diethood (though no worries, there is nothing diet-y about this cake!). And the second is the Amateur Gourmet's Strawberry Shortcake.

Since I had a pretty big crowd and never had attempted those recipes before, I mainly sticked to the instructions. However, here is what I changed:

Chocolate Mousse Cake

  • my cake pan was 'normal' sized which made the cake bigger but flatter. I was a bit concerned first but really liked it at the end, because this cake is really rich and the slices that we were able to cut that way had just the right size.
  • I skipped the hazelnut flavour which was just fine
  • Also, the cream for the center turned out just fine, when I attempted the outer vanilla cream, things just wouldn't work out. (If you look closely you can still see that under my nicely shaped...uhm....decoration is a layer of pretty flat not-creamy-at-all-cream underneath. What I sprayed on top then was a mixture of icing sugar, cream cheese, white chocolate and (here comes the genius!) wheat bran (weizenkleie oder gemahlene Flohsamen!). This will just turn anything into a spray-able form, is super healthy and close to not visible!!!
Strawberry Short Cake
  • I kind of overread that this recipe is so awesome because it actually makes two cakes (yeeeah I know). So we ended up with one pretty big cake. No harm was done ;)
  • I skipped the corn starch, which worked out, but if I would have had any, I would have used it!
  • The filling: I don't know what it is, but cream seems to avoid me. It just never works out. So, my filling and topping ended up slighty different. It was a mixture of 1 cup heavy whipping cream, icing sugar (again. haha) and a tiny bit of melted white chocolate. Worked wonders!!!
  • I drizzled some melted milk chocolate over the top at the end. This, however, is totally up to you ;)

I finally managed to label my cups accurately! (Before the baking process)
First cake base done, one to go
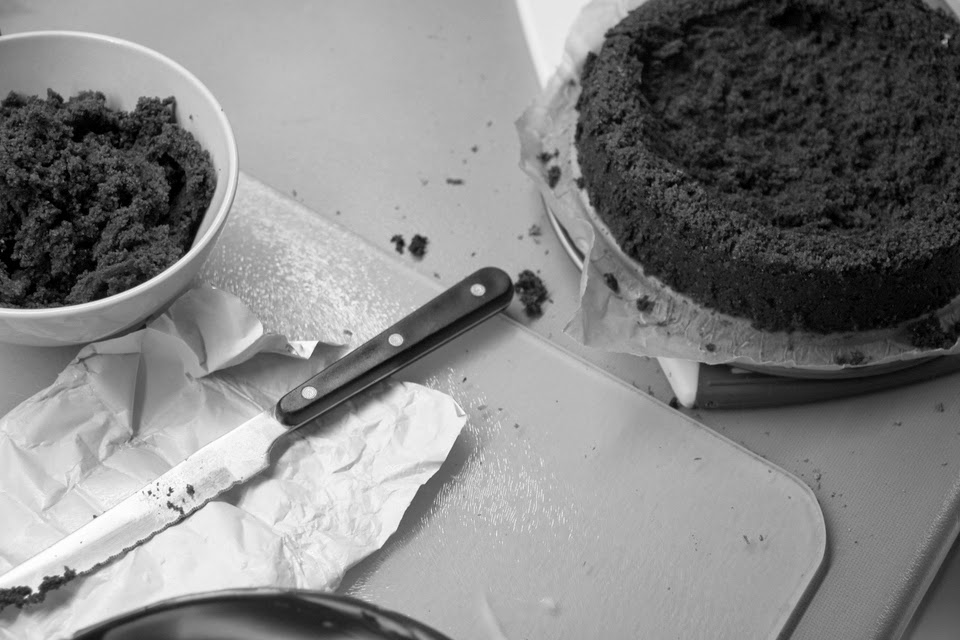
The beauty of cocoa and flour dust
And that's it. In total: AMAZING cakes (everyone agreed on that and they were gone at the end of the night) and totally manageable!! ;)

Happy and excited soon-to-be-eating-cake-friends. We had to hold them back so we could cut the cake properly...
....which my mum did a beautiful job on. And look at all this moist, soft, creamy, chocolaty cake goodness!!!
And this is me still piling cake on my plate in the middle of the night....after I probably already had more than my fair share of it :D
But you can never have too much cake, right?! So, happy cake baking to you all! :)

Friday, 31 January 2014

Peanut butter Banana {cake-bread}

Looking at food makes me nearly as happy as writing about food. It's probably just a more serious case of food love. Could that be it? Like, I not only like to eat food. I also love to prepare it, look at it, write about it...the list goes on and on.
So here we are with this recipe.


Peanut butter takes a special place in my heart. All the way back when I was a kid and living at home (that's a weird sentence by the way) we never had peanut butter! Never. We had nutella as probably every household in Germany has, but no peanut butter. My first encounter with it was when I stayed at my, at that time, best friends place, and her family introduced me to Belmandel with peanut butter (along with that also went the introduction of belmandel and cottage cheese but that just on the side). It tasted a lot like a Twix bar but in bread form. So: Really good!!!

Several years forward and I found myself in Canada Vancouver, having breakfast at a single guys household. What is there for breakfast? Toast! And peanut butter! And Jam. That was my first time of pb&j and I have to admit, ever since I'm hooked! Either pb&j or put a banana on top of it! Or with chocolate. As in normal eating chocolate, dipped in pb...we tried it all. Also, it really is tightly bound to cookie butter. But that is a different story ;)
So unnecessary to say, not only does it remind me of really special and really fun times, but also do I love everything that has peanut butter in it! ;) Like this peanut butter banana bread I had to make. I didn't want to let those bananas go to waste, did I?!
This is the original recipe. Below is my tweaked version.

Peanut Butter Banana Bread
You'll need:

  • 2 overly ripe bananas
  • 1/2 cup brown sugar
  • 1 Teasp. baking powder
  • 1/3 cup peanut butter
  • 3/4 cup whole wheat flour
  • 1 egg
  • 1 large tablespoon yogurt
  • pinch of salt
  • ~80-100 gr nuts (I used hazelnuts)

  1. Mix together the sugar and the butter and beat until light and fluffy.
  2. Add the egg and beat again.
  3. Add the peanut butter, the yogurt and a pinch of salt. Again: Use your mixer ;)
  4. Mush up the bananas (I like to leave tiny chunks), add your mashed bananas, the flour and your roughly chopped nuts. Mix.
  5. Put in the oven for about 50-55 min on 150°C (Heißluft!!) or 350°F (normal)
And just so you have something to laugh about...this is how my handwritten "recipes" looks like (they are only for my personal use....so messy is totally ok!!):

Enjoy! (btw it's needless to say, that I topped the whole thing with more peanut butter, right?! ....saying that, I should have whipped up some peanut butter frosting and put it in top of that cake. Next time!!)
Oh, and this is also great for freezing!


Wednesday, 9 October 2013

Messy Vanilla Lime Cheesecake {A cake from waaaay back}

This might be a bit out of the line right now, but this cake needs to get it's time and attention. And while I'm too weird to write properly right now anyway, it might just be the perfect time.

This post needs a special introduction. When I first wanted to post about the cake that's going to be mentioned here, I discovered that I left my SD card inside my camera, which....I gave away to a friend. Bummer.
Thing was, she sent me my SD card over, since my camera was still at her place and I put it on my desk sort of forgetting about it. Than I got sick. With a bad bad cough and a serious runny nose. Which meant heaps and heaps of paper tissues. And somehow, my SD card mysteriously went into this paper tissue pile, and with all the paper tissues, down into the waste bin. That's at least, what I thought happened. Because I couldn't find the card anymore. And I'm normally a pretty organised person.

Anyway, make that 6 month later, weird and (ha told you so) organised me FOUND the SD card! Which left me with the thought-to-be-lost-pictures of that cake....which leaves us all with a post that got written 6 month ago and just waited for this day ;)

6 month ago:
Once again, I found myself rather unconsciously lying on my bed, too lazy to get started with anything. And, because I'm normally a pretty busy person and I hate wasting time....don't worry it never really lasted long, this time (it was a Wednesday) I went down into our kitchen to bake something.

Also earlier, when I had blogged about the Lemon-Chocolate-Pie by neverhomemaker, one of my beloved little brothers (I need to use this term as much as possible before they'll become official adults at the end of this month!!! Update: By now the ARE officially adults. Crazy!) had left a comment, saying he wanted a piece of that pie. I was kind enough to break the news to him that this pie contained a huge amount of tofu (my brother is a 100% carnivore, considering his eating habits) so he quickly took his request back. But I promised him another cake if he would come over for the holidays on that certain Wednesday. I do keep my promises!


To make the story a bit shorter, my mum wanted cheesecake, I love cheesecake, so cheesecake it was. I had planned on using my favourite cheesecake recipe (This one) but it turned out I didn't have anything (at least nothing in the right amount) it was asking for.
So, If you want to keep it simple: Follow the link above.
However, if you want to keep it messy: Follow the list below! Ha!


Amazing Messy Vanilla Lime Cheesecake (recipe below can be taken more or less serious)
You'll need:

For the crust:
  • a bit of this (all the crust leftovers I had)
  • a bit of that (just as above)
  • some flour
  • 1 Tablespoon cocoa powder
  • butter to one's heart extend
In a food processor mix all the things together until they have the, for you, right consistency. Fill into a, with a baking paper lined, cake pan. Preheat your oven to 325°F/160°C.

For the filling:
  • ~450gr cream cheese (we had three open packages, I just used them all)
  • ~150gr no fat quark/curd (I just kept on spooning until I felt right about the amount)
  • 200gr whipped cream
  • a pinch of salt
  • 5 eggs (I might reduce this to 4 eggs...5 made it rather...eggy)
  • 1 cup brown sugar
  • 1 squeeze of lime juice (leftovers from the pie again. Depending on the amount it will be more or less lime-like. I normally just like to give it a hint of lime.)
  • some fresh vanilla
  • 2 Tablespoons corn starch
Mix everything together in a bowl (as in there is no order, whatsoever!). Fill into the crust bottomed cake pan and bake for at least 1 1/2 hours.
While baking: Listen loud to some music and clean your room, the kitchen and the house!


When the cake is done, it's important to let it cool inside the turned off, but open oven as this will prevent the cake from getting this not so awesome cheesecake-hole in the middle!
And this messy cake was good. Really good. Maybe better than the original recipe. (At least that's what my mum said...and what I thought haha)

As you might can tell (in case you read my blog more often) this cake happened all the way back somewhere this spring. And, and here's the thing, I did found my SD card...so, you do get a picture of the cake after all ;) It's probably just another story how I, sometimes, mess up things. But in a god way ;P


I wish I could have a pieve of this right now...

Friday, 27 September 2013

Eat a chocolate cake with a spoon {or my fingers. A bucket list post}

Ok before I start saying anything I have to say: This. Is. The. BEST. Cake. I. Ever. Had/Made. EVER.! Do I have your attention? Thank you!


So, with everything that was coming up recently, it just felt right to tackle that point on my bucket list. I don't know when I had started to dream about eating a whole cake with my fingers (or just a fork) but I guess it's some time by now (haha is that weird?). In my mind, it always was a romantic night with my boyfriend, it was smelling heavenly of  freshly baked chocolate cake and in the spur of the moment we would dig in the cake with just our forks, not bothering to cut pieces and ending up having our faces covered in chocolate icing, cake crumbs and huge smiles. That combines quite a bucket of cheesy, doesn't it? Well, sometimes, I have to admit, I do like it cheesy.
So since the whole thing didn't seem to happen that way, I decided I would take a step and help fate a bit. And who else, but some of my closest friends could be just as good to savour this whole cake-point. And with this Thursday also being our 'last' girls evening (we're talking of years and years of Thursday-traditions!!!!) it was more than appropriate.
Therefore, when I stumbled across this recipe, I just knew it was perfect. I love (no wait, is there something stronger than love? In case you come up with something, insert it here!) chocolate. And I also love coffee. So the combination of a chocolaty-coffee-ish cake base, the chocolate mouse centre/layer and the lighter milk chocolate frosting, could it get any better?!

Except for a few subs of things and tiny changes, I didn't have on hand, and the fact that I divided the recipe in half (I wanted a smaller and more compact cake) I pretty much stayed with the original recipe. Head over here (the recipes are a-m-a-z-i-n-g!!!) for the original version or read on for my to-gram-translated-cut-in-half-and-substituted recipe here.

For the cake base (1/2 of it)
  • 42gr butter
  • 85gr sugar
  • 1/2 flask (those tiny German ones) vanilla essence
  • pinch of salt
  • 85gr flour
  • ~1 'heaped' teaspoon baking powder
  • 25gr cocoa powder
  • 1/2 cup coffee
  • 1/4 cup buttermilk (substituted by milk mixed with lemon juice)
  • 1/4 cup sour cream (substituted with cream cheese)

  1. Preheat your oven to 350°F/ 180°C
  2. Beat together butter, sugar, salt and vanilla essence until light and fluffy.
  3. Add flour, baking powder and cocoa powder.
  4. Soften again with the coffee, the buttermilk and the sour cream.
  5. Put in for 35-40 (I needed 40) minutes and test with a wooden tooth pick.
  6. (Can you tell I go easy with the whole cake-batter-mixing-rules haha).

The cake was easily thrown together and I made it the day before so that I would just have to assemble the rest with the creams. Yeah, right. "Just".
My cake base the evening before 'the day' ;P (and yeah, you can totally see all my test-poking-holes haha).

For the chocolate mousse 
I completely followed the recipe here, so I'll provide you with only the link again. 
A few side notes: This included a lot of beating/mixing. Also, somehow I think my mousse didn't had the right consistency at the end, though it still worked and for sure tasted amazing. I think it might be that my honey as well as my chocolate weren't as hot as they might have needed to be. (?)

The kitchen in between. Quite a mess....
For the frosting adapted from Martha Stewart's Milk Chocolate Frosting
This is slightly adapted because a) I somehow switched of my brain while I divided the recipe into thirds (my experience with Martha Stewart recipes is, that they always make more than plenty. My 1/3-version still left me with left overs!)  and used my 3/4 cup instead of my 1/3 cup (my frosting ended up with a slight amount of more sugar *cough*) and b) I didn't have any sour cream nor cream cheese! I went with no-fat curd...which worked surprisingly well (probably because it balanced out all the sugar).
  • 140gr milk chocolate
  • 3/4 cup sugar
  • pinch of salt
  • 160gr butter
  • 2 1/2 tablespoons curd (Quark)

  1. Beat together butter, salt and sugar until light and fluffy.
  2. Add the melted chocolate and the curd. 
  3. Beat again until light and fluffy.

So. This was not just the best cake I ever had/made but also the most time consuming. It actually wasn't as complicated as I had feared but the three different batters, plus all the different melted and separated ingredients just made up for quite a lot of dirty dishes. Definitely a special-occasion-cake but don't be shy! This is totally manageable!!!
Oh, I also didn't go with the 'diamond' shaped centre form because it just didn't appeal to me. I simply cut of the top, hollowed the rest of the cake, filled in the mousse and put the top back on. After that, cover everything with icing ;)


And let me tell you, eating a cake without cutting, just with your forks and fingers is amazing!!!!
(Btw: This was a once-in-a-lifetime thing, so I might actually have eaten chocolate cake until I got sick that evening. Whupsa...but so worth it!)


And this is what was left afterwards for future-mixed-deserts. If you have questions, don't be afraid to ask :)

Thursday, 29 August 2013

Peanut Butter Chocloate Coffee Cupcakes (PB triple C's)

This is so me. Instead of finally getting my mail things done...or my schedule organised for the coming month, I'll sit back and write a post about my last Friday. Yeah.
Anyways. But a last Friday post might actually be more interesting than all the mail things because, last Friday, we decided to bake. (Ok. We planned to bake before. Because, seriously? We are just way to organised around here to just do something ;P).
Anyway. It was my turn to pick the recipe so, naturally, we ended up with something with peanut butter in it ;)

Ok. This picture might be confusing. But trust me...I can explain it!
The original recipe is from AbeautifulMess (Emma and Treys wedding shower party cupcakes) and except for a few little tweaks we mainly followed the recipe).

For 20 Peanut Butter Coffee Chocolate Cupcakes (PB triple C's that's what I just came up with anyway), You'll need:

  • 3/4 cup softened butter (we had margarine)
  • 1 1/3 cup sugar (And I might just use 1cup next time. The recipe made some really sweet cupcakes)
  • 1/2 teaspoon vanilla extract
  • 3 eggs
  • 1 3/4 cup flour (I could imagine that wholemeal flour (1 1/2 cups) also would be great. And more healthy!)
  • 1/4 teaspoon baking soda
  • 3/4 teaspoons baking powder
  • 1/2 teaspoon salt
  • 2/3 cup creamy peanut butter (we used "healthy" pb so that one was also less sweat!)
  • 1/2 cup Greek yogurt
Our main changes happened in the frosting. It called for 1/2 cup black coffee, but we both had a lot of bad experiences of putting water into melted chocolate. So instead, I made a super concentrated coffee paste (it was still difficult to incorporate, so next time I would make my coffee paste with milk!) and we sued way more icing sugar. So this lists the ingredients and amounts we did:
  • 9 ounces (455gr) dark chocolate
  • 10 tablespoons butter
  • about 10 piled high tablespoons of icing sugar
  • "coffee paste" (I used instant coffee powder, as much as I would use for a normal cup, but simply dissolved it in about 1 tablespoon of water. Next time, it's going to be milk!)


  1. Preheat your oven to 350°F/180°C.
  2. Beat sugar and butter together until light and fluffy.
  3. Add eggs one at a time.
  4. Add the vanilla.
  5. Add all the dry ingredients and mix until well incorporated.
  6. Add the Greek yogurt and the peanut butter and mix again.
  7. Fill your dough into a cupcake tin lined with paper forms and put into the oven for 20 minutes. (Or until light brown and an inserted tooth pick comes out clean). Let them cool down.
  8. For your frosting: Melt the chocolate. Add the coffee and the butter. And, up to your preferred consistency, add the icing sugar. With the coffee-water mixture our frosting got really really thick. It eventually softened a bit with the butter and the icing sugar but I still wouldn't go for any kind of watery-somethings in melted chocolate.
  9. For the filling (optional): Cut a small whole into your cupcakes and fill it with peanut butter.
  10. Top with icing. We also thought, since our cupcakes turned out super sweet, that some roughly sprinkled sea salt would be really good on those....or caramelised sea salted peanut crunchs on top....omg the possibilities are endless!!!!
And here's where we need a little explanation.

Because my friend and I obviously couldn't eat 20 cupcakes by ourselves (let's just say we couldn't. We actually don't really want to find out...probably: we could!) we also included out boyfriends into the baking planning. And with her and me plus bf's...the thing got interesting.
When it comes to baking I don't really mind if it gets unhealthy. This is supposed to be a treat. I want my treat to be awesome. So of course, it will include sugar. My friend is more the health nut. And her bf is simply super picky. So, at the end, we had four different cupcakes :D
- Yummy (aka unhealthy sugary :P) bb and coffee frosting
- Healthy pb and plain chocolate frosting
- No pb filling (there was still some in the dough though) and coffee frosting
- And...no pb filling and plain chocolate frosting

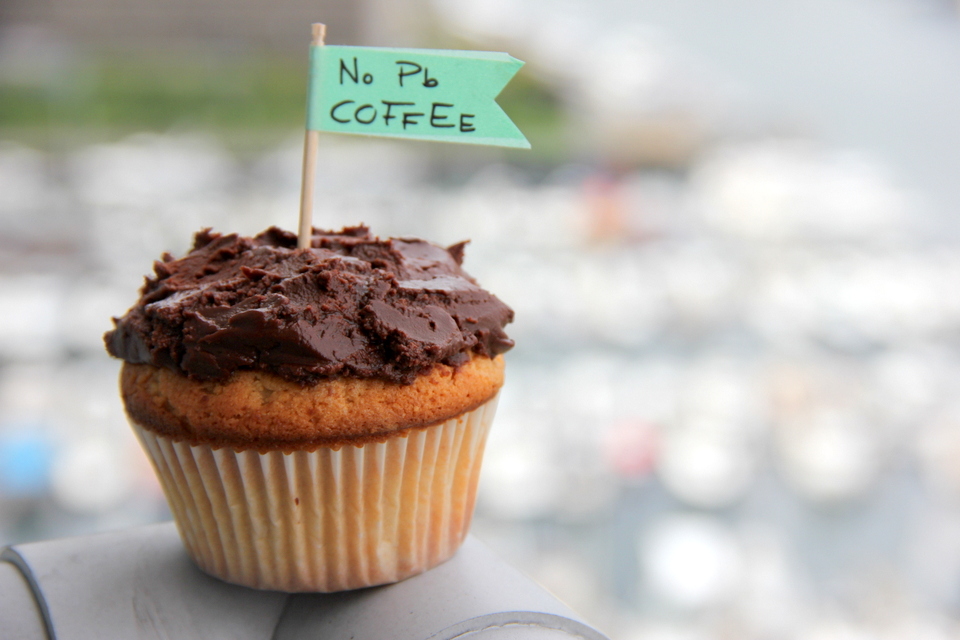
...and of course, I had to make little signs for all of them ;P


Enjoy your pb adventures! (Oh and my boyfriend told me earlier last week that if you would just read my blog and hear me talk about food, one would think I'm a fat person. How do we feel about that. I guess I'll take it as a compliment that I can talk and write about food like this but that I'm still not fat? Haha. It keeps me wondering...)

Sunday, 2 June 2013

Healthy-Mess-Cookies {and don't let the healthy fool you, they are good!!}


Those cookies are, I have to admit to my own embarrassment, kind of a joke (in a good way!!) because they were never supposed to happen in the first place. My friend and I had scheduled another bake-skyping date (this is the story of our first one) on Friday morning but while scheduling it, I had sort of overlooked the fact that my mum and her boyfriend would also be up at around 7am. Our kitchen is small, uhm cross this out, our kitchen is tiny, so I couldn't really start baking before the two of them had left.
So instead of baking, I gave a little rant about my life, than a bigger one about my cat in general and another smaller one about how my legs are looking right now (cat scratches all over the place) that's what girls talks are for, right?! ;)


At the end, I ended up rather late in our kitchen (she was already done with all the baking) so I just sort of threw everything together (this is meant, the exact way I wrote it) and prayed they wouldn't turn out non-edible.
They turned out surprisingly good. Actually, addictively (is this a word?) good! As I'm eating at least two every day (and that's all I can do, to give my super restrain some credit!!). And, and here comes the best part, they are healthy!!! (haha I can see your faces sinking. But they are really good! Trust me!).

Only draw back, since they were never supposed to happen....this is a kind of Jo-and-her-usual-messes-recipe. Means: (cough) It's pretty much up to you. I can only give you some inspiration.
But that's the most fun isn't it!? All together: Yay for kitchen messes!!!

You'll need for one sheet of Healthy-mess-cookies (all measurements underneath are to be seen approximately):
  • 50gr. butter (a bit less than a quarter of a normal 250gr. butter package)
  • about the same amount of crunchy peanut butter
  • sugar (I think I had a bit less than the butter amount together. Next time I also might go for honey!)
  • 1 egg (Duh! That's accurate!)
  • 1 pinch of salt
  • 2 Tablespoon flax seeds
  • flour
  • oats (those were about the same amount. Probably about 1/3 of a cup)
  • 2-3 Tablespoon corn starch
  • 50gr dark roughly chopped chocolate
  • any trail mix you like (Mine had peanuts (a lot), hazelnuts, cashews and raisins)
  1. Preheat your oven to 180°C/360°F and line a baking tray with baking paper.
  2. Beat together both butters and sugar until fluffy. Add egg and salt and beat until fluffy again.
  3. Add the flour, flax seeds and corn starch and mix together.
  4. Fold in the oats, the chocolate and the trail mix. Let stand for a couple of minutes (I wanted my oats to soak through a bit).
  5. Spoon the mixture on your baking tray (leave a bit of space in between each heap) and bake for about 10 minutes until gold and brown.
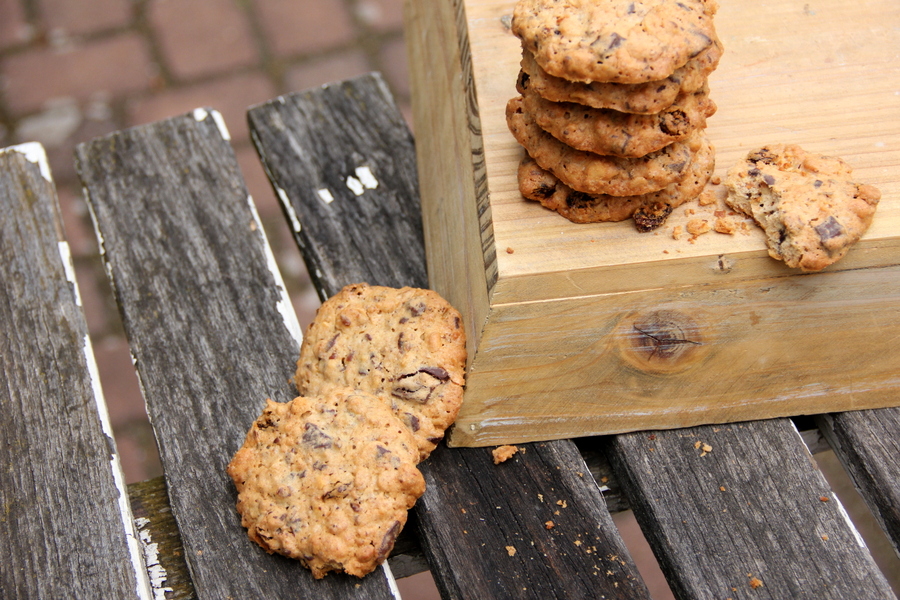
Those cookies are super crisp, crunchy and an amazing combination of not-too-sweet chocolate, crunchy nutty nuts and soft raisins. Seriously. They are amazing. It feels a bit like eating healthy muesli/cookie/nut/crunch bars. Yum! So go ahead and make some messes ;)

And a nice start into this week to everyone!

Thursday, 30 May 2013

A café-like heaven rhubarb cake {and a little rant}


I'm in the midst of applying for universities right now (uhoh exciting!) and my full time job is about to start any time soon as well (I'm so happy to get an organised schedule back. This whole every-week-is-different does have some pros but is also really exhausting).
So with this, sounding all nice and organised here comes another rant (sorrysorrysorry....though maybe you're familiar with the problem?!). You might have noticed that my kit is/was/seems-to-be-forever sick. And it didn't turn out as one of those '10-days and everything is fine again '. Nope. There were complications. Operations. More complications. By now, she's feeling much better. Except for the part, that she feels so much better now, she notices, she doesn't like her current situation. And that's where my problem starts.
She wants to be on my lap/legs/belly/arms 24/7. Non. Stop.
If she doesn't get her way, she complains.
She constantly keeps trying to remover her suit aka: get to her stitches and remove them (not that we already did that. Twice. She keeps trying).
She is still rather....uhm...clumsy with her toilet. Which stands in my room. Enough of that.
The list goes on. And on. And on.

I am so sorry! I know this is 'just' a cat. But seriously?! Sometimes she feels like a tantrum throwing toddler right now (ok it's not that bad, but close).
Anyway. This is where I wish the part of me being a super woman with no ending strength, nerves and endurance would start. Sorry to disappoint you. Not happening here.
I tried everything. It didn't help. So this afternoon (uhm more like half an hour ago) the cat hat to move into my mums studio again. Without me.

Don't get me wrong. I love my cat. I just felt that at this point of our relationship, distance would be a good option for both of us.
End of the story. I'm defeated.

By the way. This whole thing makes me think of meditation...do you do that? My family is rather...actively interested in this kind of stuff so I get a lot of times that I should be starting doing it since I'm such an overactive and definitely-not-grounded person. Though every time I try it ends like this (sorry dad, the grounding part will have to wait for later...years...uhm):

 Ignore the weird subtitles...

Anyway. This post actually got written because I wanted to share another recipe with you. And this time my mum baked it. She normally never really gets around to it because either she doesn't feel like it or I already baked something. This time she was lucky (I was cat-occupied).


Simple but oh-so-delicious rhubarb cake

The original recipe is from here, though my mum tweaked a few things (I think I just got from where I got my tweaking-recipes part). This one includes the tweaks, for the original one, just follow the link above (though that one is German).

You'll need:
  • 400gr rhubarb
  • 1 Tablespoon brown sugar
  • 100gr butter
  • 180gr brown sugar
  • 1 package vanilla sugar
  • 1 egg
  • 130ml egg liqueur
  • 180gr whole grain flour + 100gr normal flour
  • 2 Tablespoons baking powder
  1. Preheat your oven to 170°C/338°F.
  2. Cut your rhubarb into 1cm pieces and let them soak with your tablespoon sugar. (About 10 min. will work).
  3. Beat until fluffy: Butter and sugar. 
  4. Add egg and beat until fluffy again.
  5. Add all the liquid ingredients and mix. After that, add all the dry ingredients.
  6. Fill into your pan and add your rhubarb pieces on top.
  7. Put it into the oven for 50 minutes or until a inserted toothpick comes out clean. 
Tip: Don't butter the sides of your pan! The butter makes the sides get hot faster. Therefore the cake will be done earlier. That means your sides won't rise as much as the middle part of the cake will. If you don't butter them, thinks will be pretty even ;)
We also found, that the egg liqueur taste wasn't really strong what might have been due to the fact that we used whole grain flour. However it kept it really moist. In the original recipe, they only use normal flour and people kept saying how wonderful the liqueur taste would add to the the whole cake experience. So you might want to try it out.


What I love(d) about that cake is, that it's so simple. You mix your stuff. And after it comes out of the oven it's done. No fancy-schmanzy things but old and simple basics. And still: It's soft, it's moist, it's fluffy, the balance between sweet and sour is perfect. It is one of those cakes that just simply stand for themselves and are awesome that way. Enjoy!
Oh and it's not like I wait for days to take my pictures (Since:only a quarter of the original cake is in the picture). That was within the 24 hours range after that cake made it out of the oven...ups ;)
And you can eat it right after it comes out of the oven! With a serving on vanilla ice cream. omgsogood,wehadtwoservings...uhm yes. I did anyway.
I'll be back on trying to get this meditation thing working. I'm at least sporting yoga clothes right now. I always feel more grounded just by wearing them (is that weird. I guess no). The meditation will just have to wait a bit longer ;)

Friday, 10 May 2013

Baking firsts and some random peanut butter affairs

I was thinking about a little break from blogging (would anyone really mind?) though I quickly figured I'd miss it too much (all the nonsense babbling about my baking-randomness and all those tiny tidbits) so I guess you can all stop holding your breath and be happy again. (Heavy sarcasm).

Anyway, just recently I was talking...uhm writing with a really good friend and as so often while talking with friends (female ones), our topic went to our body, the food we eat and what we actually hope to accomplish until the coming . (Seriously? I hate summer because of all those things: bathing suits and bikinis and people oberving each other more closely than usual. I just never seem to feel comfortable. Never. And since I know this doesn't really relate to my weight (I did mention I never felt comfortable, didn't I?) I might just suck it up...not going to happen...I know).

So, what we wanted to accomplish, as just in any other summer, loose weight and get a nice toned body. (Uhm...probably never going to happen) But, and here's the thing: We figured out, it's this whole baking thing that just totally gets into the way every single time.
I mean, how are you supposed to get a nice body while constantly snacking on cheesecake, chocolate things or peanut-buttery-goodness?!
So I might just have to invent a new bathing suits concept?! How about that?
And jep, because that's not going to happen either...I'll just stay with my baking messes and hope summer will bring a lot of really open minded and nice people who don't care on how I'll look in my bathing suit!

And for today, that also means I'm going to "share" my first recipe ever, where I did not tweak a single thing! (Bummer!) Here we go:

Healthy Peanut Butter Cookies by neverhomemaker (I do make way too much stuff from her blog...)

Oh and only phone pictures this week...I gave my camera away to a really sweet friend.
The best thing: They are healthy! So no guilt while snacking on peanut butter cookies. Yum!
I think I kept my messes to a minimum this time. Ha!
Making those cookies involved a lot of "taste testing"....


And than they were done. Covered with heapings of chocolate and oh so oatmeal-ish, peanut buttery delicious!! 

Now we have a box on out table full with them...though the box is only half full already, but oh well. This stuff is just way too good ;)

Wednesday, 8 May 2013

Protein Rasperry snack for in-between's

Just a really short "hi!" (because the weather outside is way too good to spent a day inside and I still have to do my groceries...) and I'll leave you with his little snack for comfortable and lazy in between's.

Raspberry Meringue Yogurt
  • 5-6 little meringues
  • 1 handful frozen raspberries (either defrost them straight away or give the whole thing about 45 minutes to sit)
  • plain yogurt
  • no fat Greek yogurt
  • optional: chocolate drops
Layer: Meringues, rasperries, both yogurts and chocolate drops. Let sit for about 45 minute. Enjoy ;)

Monday, 29 April 2013

Ginger-Lime-Rhubarb Compote {an after pie date}

Do you have certain routines you tend to stick to?

I was thinking about that recently while I was reading through old blog entrees I had posted back in Vancouver (Well it was this certain one). I think I do have a coffee routine for example (two coffees each day (don't judge me!) one after breakfast and one after lunch). Or a bath routine. But what are routines exactly? I sort of think, they are probably nothing more than rather specific habits.

Anyway. Back to what I actually wanted to talk about. Pie. As in the pie I made this weekend and I was posting about yesterday.
I told you that I somehow was sort of a bit unsure (haha that does sound quite uncertain!!) about the whole tofu thing. So, yesterday I took that pie to another level. And after that I felt more than a 100% sure about the recipe!!

I love the colors of rhubarb
And the smell of ginger
Rhubarb-Ginger-Lime Compote
You'll need:
(My pre-skype cooking because I woke up too early am apparently bad at math)
  • 1 package rhubarb (I think that meant about 8-10 rhubarb "rods")
  • 1/3 cup brown sugar
  • 1 piece fresh ginger (thumb-size)
  • a bit lime juice (I used my leftovers from making the pie...so probably 1 Tablespoon)
  1. Wash and cut your rhubarb into small pieces.
  2. Fill into a large sauce pan and cover with the sugar and the lime juice.
  3. Let it sit for at least one hour (Until the rhubarb released some liquid).
  4. Bring to a boil until the rhubarb has softened and the whole thing has a compote-consistency.
  5. Turn off the heat and add your pealed piece of ginger.
  6. Let it simmer for another few minutes. Remove the ginger afterwards.
Either leave it in the sauce pan and eat it immediately plain, with yogurt or with vanilla ice cream, or keep it for the next day. Or fill it into a jar. If you want to keep it longer, flush the jar with boiling water and fill the rhubarb compote in while it's boiling. This way the jar will "seal" itself and you'll be able to keep it longer. We however, didn't keep it longer.
Because: If you take a piece of that awesome pie, add some vanilla ice cream and left over crust crumbs AND pour some rhubarb-ginger compote about the whole thing...

...it's going to be heaven!!!! Trust me!


Otherwise today is the start of my work week (I got Monday off but I'll have to work Saturday so that's kind of fair). Happy work to you all! (I'm trying to convince myself with my own enthusiasm...does this count as cheating?)