I'd be really happy to see you again :)

Tuesday, 13 June 2017
Thursday, 31 December 2015
New Years Eve {A last and quick DIY, because...well it's me}
So, it's nearly nearly New Years and I have to hurry because my amazing boyfriend is getting the food ready in the kitchen but this has to be done before the New Years starts! ;)
I'm normally in love with technology. Without my phone, I'd be lost. But when it comes to organising and scheduling my weeks it has to be paper for me.
I started with my calenders some when back 2010 (and I still have them all...I just need to figure out which box they're in...). Back then I used pre-made (aka: normal calenders) and just kept my cover self-designed (plus the whole, picture, tickets, bum wrappings and whatever you can think of that I put inside). But now, I guess since 2012 I'm making my own calenders. The plus: They are exactly how I need them AND: they are only for half a year. That's around the time when I need a change. So half-a-year-calenders it is.
I thought, since my new one starts on Monday, I'll post a quick DIY so you can grab a simple notebook just before that and make your own. It's easy! And so convenient and fun!!
You'll need:


And I normally leave a few pages empty at the end for notes, scribbles, whatever. It's also where I keep all my lists. Bucket list, work-on-yourself list, budget list, 2016-list....I've got them all!!!

This half-a-years calender is way cuter then usual. I normally go for plain blank but I discovered this cute one at the Design Market we went to in October and just HAD to. The envelope is from there as well. Along with a lot of cute paper that still awaits its destiny!

The book is already filled with a few cute sketches and a year-overview. The rest will be filled by me ;)


My boyfriend just came jumping into my room carrying a sparkler. I guess its a hint that it's time for me to go ;)
Btw: That's the girl I bought all the stuff from:

I'm normally in love with technology. Without my phone, I'd be lost. But when it comes to organising and scheduling my weeks it has to be paper for me.
I started with my calenders some when back 2010 (and I still have them all...I just need to figure out which box they're in...). Back then I used pre-made (aka: normal calenders) and just kept my cover self-designed (plus the whole, picture, tickets, bum wrappings and whatever you can think of that I put inside). But now, I guess since 2012 I'm making my own calenders. The plus: They are exactly how I need them AND: they are only for half a year. That's around the time when I need a change. So half-a-year-calenders it is.
I thought, since my new one starts on Monday, I'll post a quick DIY so you can grab a simple notebook just before that and make your own. It's easy! And so convenient and fun!!
You'll need:

- notebook
- pens to draw the dividers
- masking tape (just because masking tape makes about everything better and cuter!!)
- one empty envelope
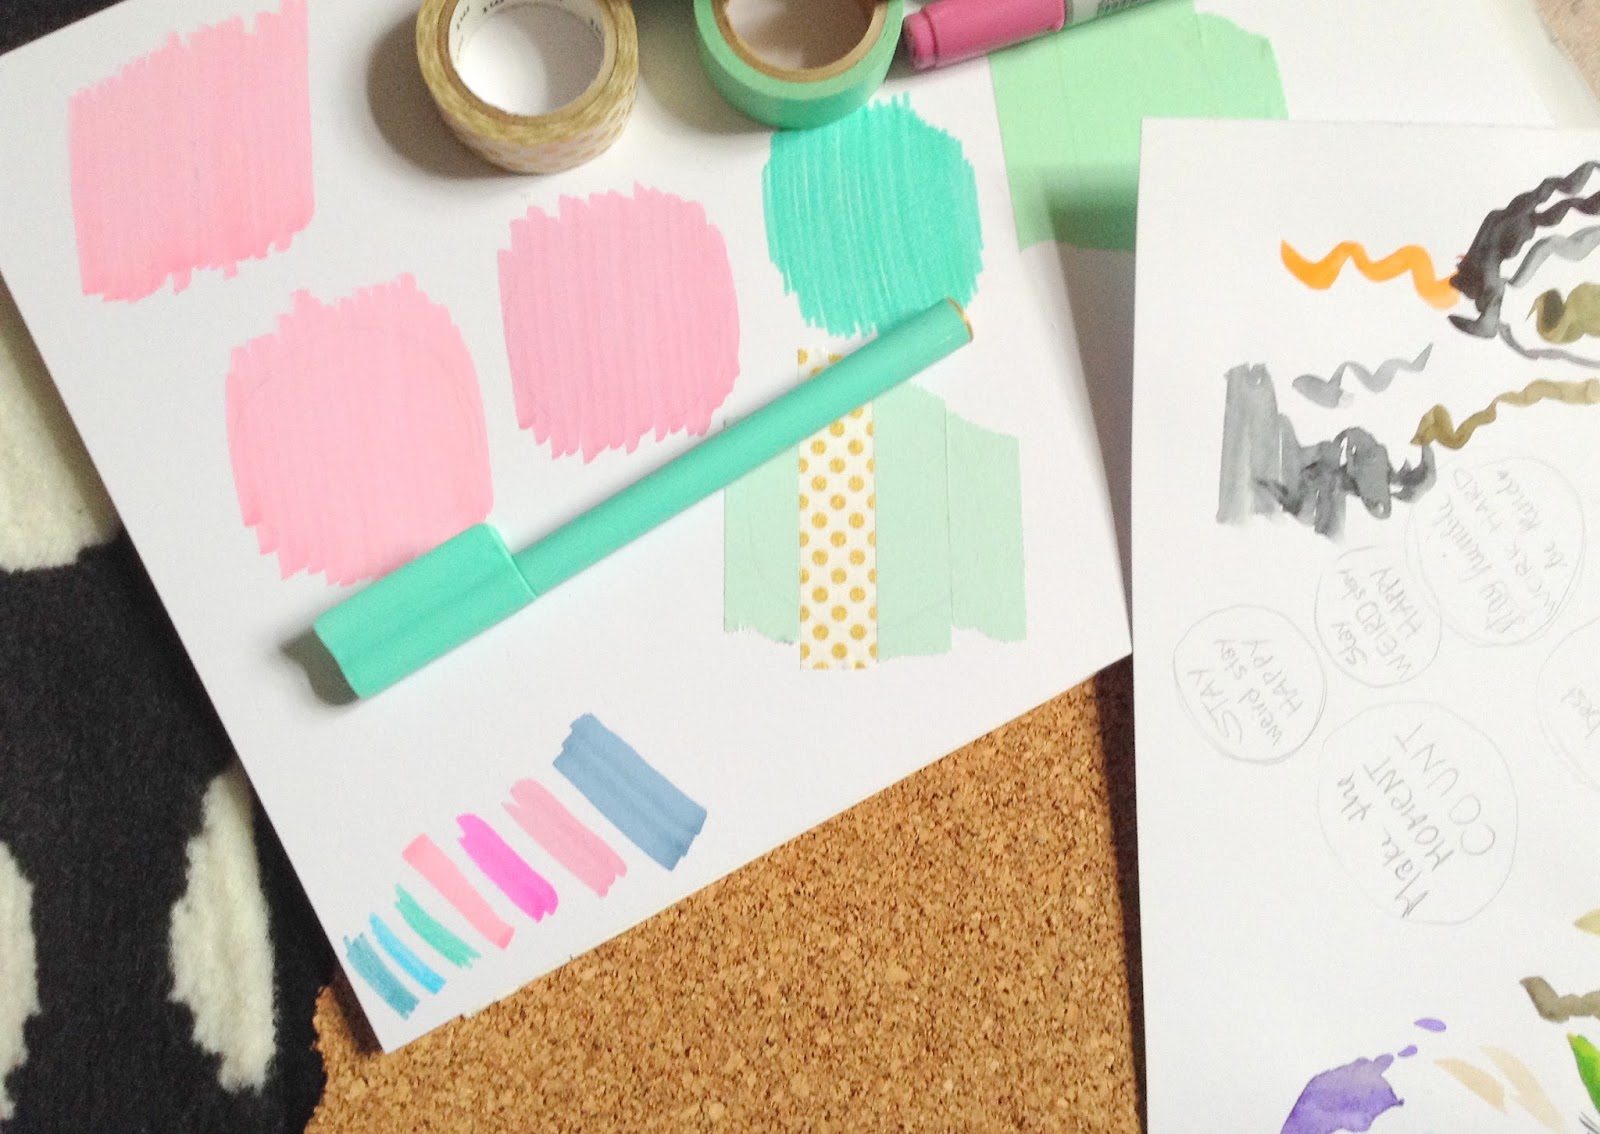
As a first thing, I normally start with my weekly design:

Since I love to doodle and I'm totally addicted to my To-Do Lists, I leave one page empty for that and the other page for weekly appointments. You could go squares all along, or just bars...or bubbles. Whatever suits you best.
After that I add an empty envelope to the last page. It comes in really handy for collecting cards, stickers, post stamps etc.!


And I normally leave a few pages empty at the end for notes, scribbles, whatever. It's also where I keep all my lists. Bucket list, work-on-yourself list, budget list, 2016-list....I've got them all!!!

This half-a-years calender is way cuter then usual. I normally go for plain blank but I discovered this cute one at the Design Market we went to in October and just HAD to. The envelope is from there as well. Along with a lot of cute paper that still awaits its destiny!

The book is already filled with a few cute sketches and a year-overview. The rest will be filled by me ;)


My boyfriend just came jumping into my room carrying a sparkler. I guess its a hint that it's time for me to go ;)
Btw: That's the girl I bought all the stuff from:

Happy Happy Happy New Year!!!
Sorry for any typos. I'm in a hurry ;P
Friday, 27 November 2015
Sweet potato - beetroot - salad

I've been stuck in a total rut when it comes to cooking recently. Sometimes, M and me cook but that's that. Otherwise my diet consists of muesli, bread and yogurt.
Last week however, a good friend of mine brought a beetroot - sweet potato salad/dish to lunch break and it looked amazing. And since the ingredient list was incredibly short and beet root was something I haven't had in a while, I had to make it!!
I used her two basics and went a bit along what I felt would be great. Nothing fancy but it turned out so so so good!!!! Also, the portion lasted me three meals, so that might be a plus when you're making it!


You'll need:
- 1 sweet potato
- a package beetroot (I think it was about 400gr (~300-400))
- 1 package feta (200gr)
- 1 package cress
- honey
- salt, pepper and basil
- olive oil and balsamic vinegar
- pine kernels

What to do:
1. Peel and cut cour potato into medium chunks and cook until soft (~10min).
2. Cut beetroot into medium to small chunks.
3. In a bowl, mix sweet potato, beetroot, crumbled feta, pine kernels (You could roast those before, but I was too lazy) together.
4. Season with about 1 Tablespoon honey, olive oil, balsamic vinegar, salt, pepper and basil. Taste test here!
5. Sprinkle with cress!
Voila!

I have to admit, it is super low key cooking. But I did cook something ;)
And it lasted three amazing days!
Wednesday, 25 November 2015
In case you're feeling down...
This is for you ;)
Oh, and this!
 |
| Technically, M has the rights for this as it was a little present for him while I was away and he had a super stressful time. But I'm sure he won't mind sharing |
Oh, and this!
 |
| That was totally for me. We can do it!!!!!!!!! |
Monday, 23 November 2015
DIY: You can never. ever. have enough mobile cases
That's at least what I think. On the other hand, I have to admit I haven't seen anyone yet who changes them as frequently as I do. Anyway, this is my blog and it has been a year since the last one, so I'd say, we're in definite need for another one ;)


This time, the tutorial turned out to be one for two different cases. Because I finished the first one, used it a day and then figured, it wasn't me enough. So I made a few changes, et voilá!
What I love about this DIY is, that the amount of stuff you need is minimal! For the finished version I needed:


It's really quite easy. I normally start by collecting some ideas online. Cushion patterns, wall paper, sketches...everything works.
For the circles, I painted some simple lines in mat grey on the case. While that dried, I drew circles on some paper and added colour or washi tape. If you have a large whole puncher, even better!
Then I went online again in search of some cute quotes.
To apply the circle, I cut out a slightly larger circle of transparent foil. It comes of easily so you could also have like a one-week-one-quote kind of thing!
The second design is simply add a few more dots and lines to the grey main lines. For the pendant, I removed one feather and two strings from an old earring of mine and attached them with craft wire. Easy peasy.


This time, the tutorial turned out to be one for two different cases. Because I finished the first one, used it a day and then figured, it wasn't me enough. So I made a few changes, et voilá!
What I love about this DIY is, that the amount of stuff you need is minimal! For the finished version I needed:
- nail polish
- an old earring
If you want to attempt the one with the circle option you'll have to add:
- plain paper
- washi tape
- transparent foil
What was different this time is, that I used mat nail polish. I had grey only in mat and was a bit unsure of the final product but it turned out better than all the designs I did before. If I had more mat colours I'd go mat from now on.

What to do (Blogspot just deleted my whole post here...so I had to tip it again...just in case it's not as upbeat anymore ;P):
It's really quite easy. I normally start by collecting some ideas online. Cushion patterns, wall paper, sketches...everything works.
For the circles, I painted some simple lines in mat grey on the case. While that dried, I drew circles on some paper and added colour or washi tape. If you have a large whole puncher, even better!
Then I went online again in search of some cute quotes.
To apply the circle, I cut out a slightly larger circle of transparent foil. It comes of easily so you could also have like a one-week-one-quote kind of thing!
The second design is simply add a few more dots and lines to the grey main lines. For the pendant, I removed one feather and two strings from an old earring of mine and attached them with craft wire. Easy peasy.

If you lacking ideas, have a look over at the DIY page, it could be that I get too excited about mobile cases from time to time...;)
Monday, 16 November 2015
How to color much more with chalk than just the streets
I've been looking a lot into hair-dyeing options recently and so it happened that two weeks ago I ended up receiving the delivery of one package of hair chalk in all kind of colours imaginable.
If you haven't heard of hair chalk yet, it's pretty much what the name suggests: Chalk for your hair. The chalk is a non-oil based artist chalk which also can be used for normal drawings. I haven't really figured out if the hair chalk is different to the artists chalk, but from what I read, it's just the name that makes the difference.
Anyway.
I'm one pf those persons who processes life things through her hair. This way I already dyed my hair purple, red, dark brown, black and, most recently, blond. The fact that my hair is this undefinable brown-ish colour also helps a great deal ;)
Hair chalk pretty much does to your hair what any normal hair dye would. Except that it’s not permanent. Just as you would paint a picture, you’ll have to wet the parts of your hair you want to dye with water, rub chalk into them until you get the preferred colour and seal the finished product with either a flat iron or by blow-drying your hair. The colour will stay for one to two days, and simply comes off the next time you wash your hair.
...that's at least what I guessed. It turned out all right ;)

What I've learnt:
- It really is as easy as it sounds. You won't have to take extreme care of your hands or stains in general (though that's a guess, I didn't have stains) because the colour washes of easily!
- I didn't use a blow dryer or flat-iron and my colour came out really fast. Maybe it would be good to try those.
- Your hair will become super dry. As in really really dry! Also it's hard to comb. So it is fun to use the chalk once or twice but I definitely wouldn't do it too often. (Though as a plus: Your hair is only dry as long as the colour is in!)
And that's pretty much it!! (Btw: This is the package of chalk I bought, and with which I was pretty happy!)
At the end, I liked the blue so much, I went to the hair dresser and got it dyed properly....so that might be a side effect ;)
Have fun!!
If you haven't heard of hair chalk yet, it's pretty much what the name suggests: Chalk for your hair. The chalk is a non-oil based artist chalk which also can be used for normal drawings. I haven't really figured out if the hair chalk is different to the artists chalk, but from what I read, it's just the name that makes the difference.
 |
| See!? Normal pastel chalk ;) |
I'm one pf those persons who processes life things through her hair. This way I already dyed my hair purple, red, dark brown, black and, most recently, blond. The fact that my hair is this undefinable brown-ish colour also helps a great deal ;)
Hair chalk pretty much does to your hair what any normal hair dye would. Except that it’s not permanent. Just as you would paint a picture, you’ll have to wet the parts of your hair you want to dye with water, rub chalk into them until you get the preferred colour and seal the finished product with either a flat iron or by blow-drying your hair. The colour will stay for one to two days, and simply comes off the next time you wash your hair.
...that's at least what I guessed. It turned out all right ;)

What I've learnt:
- It really is as easy as it sounds. You won't have to take extreme care of your hands or stains in general (though that's a guess, I didn't have stains) because the colour washes of easily!
- I didn't use a blow dryer or flat-iron and my colour came out really fast. Maybe it would be good to try those.
- Your hair will become super dry. As in really really dry! Also it's hard to comb. So it is fun to use the chalk once or twice but I definitely wouldn't do it too often. (Though as a plus: Your hair is only dry as long as the colour is in!)
And that's pretty much it!! (Btw: This is the package of chalk I bought, and with which I was pretty happy!)
At the end, I liked the blue so much, I went to the hair dresser and got it dyed properly....so that might be a side effect ;)
Have fun!!
..oh also: My article about hair chalk is also here! Go check their page out, it's pretty fun :)
Thursday, 12 November 2015
Stijl DesignMarkt Munich
I might have just binge watched four to five episodes of New Girl. I also might have dozed off during the last two so I can't be trusted too much on the amount of episodes. Anyway, since this is my first free evening in... years, I thought it would work well to catch up on recent events!
A couple of weeks ago, my boyfriend and I visited the "DesignMarkt" in Munich. This is their website. A friend of ours was displaying her work so we got word of it and since we had just arrived back from Sweden (more on that later) and had no other plans, we went. (Also, I'm a big sucker for anything cute and artsy.....sooo of course we went ;) ).
The market was inside a building about two floors and a few spots outside. Every stand was dedicated to different little things. They even had food-related stalls! The "down"-side was: it was awfully cramped. But I guess that's a good side if you look at it from the other side. (That made for quite a lot sides ;P).

We might have been a bit tired but it sure was fun. And I'm already planning on going again next year. No one can ever have enough cute design related things!!!
A couple of weeks ago, my boyfriend and I visited the "DesignMarkt" in Munich. This is their website. A friend of ours was displaying her work so we got word of it and since we had just arrived back from Sweden (more on that later) and had no other plans, we went. (Also, I'm a big sucker for anything cute and artsy.....sooo of course we went ;) ).
The market was inside a building about two floors and a few spots outside. Every stand was dedicated to different little things. They even had food-related stalls! The "down"-side was: it was awfully cramped. But I guess that's a good side if you look at it from the other side. (That made for quite a lot sides ;P).
 |
| This was inside, down where they had amazing things like beer jam and whisky cream. I didn't try any though...figure. |
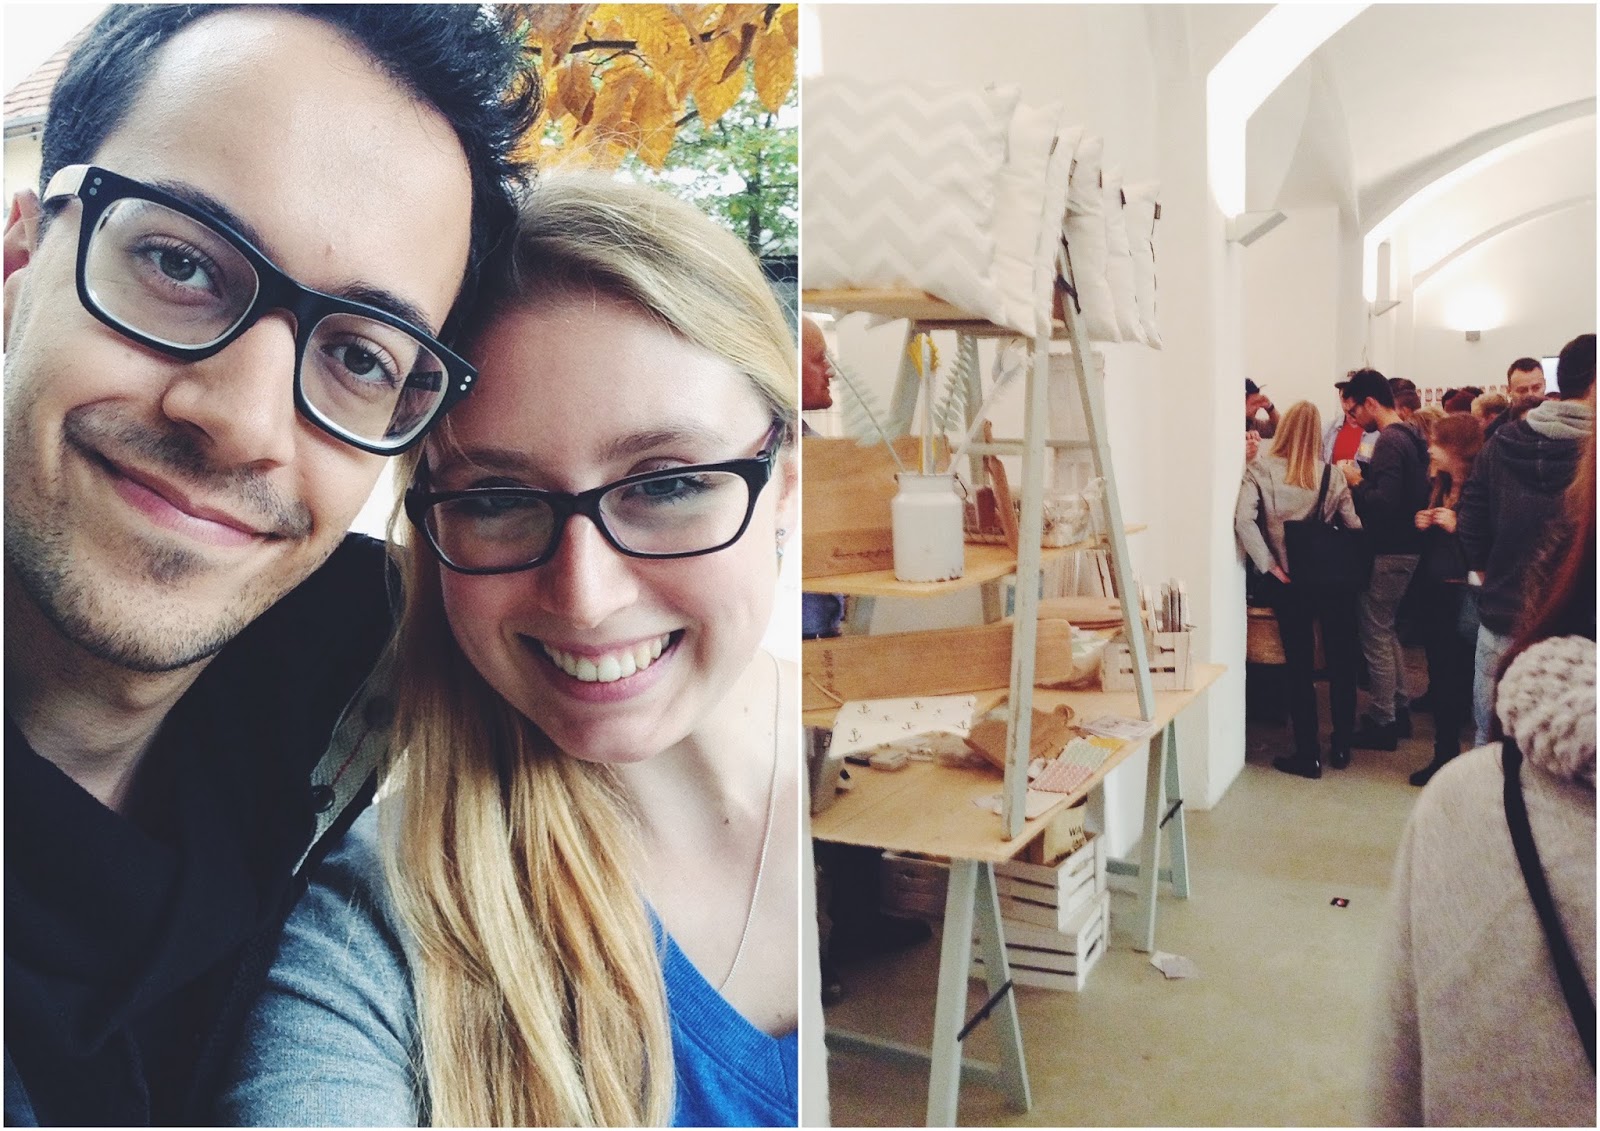 |
| We started downstairs (which apparently was wrong) so went out again and then through the first floor and down the stairs afterwards. They had watches, clothes, jewelry, pottery, cushions, stationary....everything you could think of. My favourite was a little market stall by an art student (at least she looked like one) who had the cutest stationary ever. All designs were made by her and I think I left the majority of my money there... |
 |
| The little backyard had food trucks and a few more stalls. We didn't really look too much at the stalls as there were so many inside but M did have a closer look at the food trucks! |
 |
| Who wouldn't have?! |

 |
| And that's pretty much what I went home with. Most of it are free cards but as I said...I also spent a small fortune at the stationary....part of it will turn into my 2016 calendar soon! |
 |
| And I guess there is no better way to end a day then ending it with a burger ;) |
 |
| Oh! Btw: That's the necklace I also bought and which was hard to see in the picture before. The blue letter pendant I got from M in Stockholm. But who couldn't say no to the lotus flower?! |
We might have been a bit tired but it sure was fun. And I'm already planning on going again next year. No one can ever have enough cute design related things!!!
...now I might go, binge watch some more New Girl....
Subscribe to:
Posts (Atom)