Showing posts with label Food. Show all posts

Friday, 27 November 2015

Sweet potato - beetroot - salad


I've been stuck in a total rut when it comes to cooking recently. Sometimes, M and me cook but that's that. Otherwise my diet consists of muesli, bread and yogurt.
Last week however, a good friend of mine brought a beetroot - sweet potato salad/dish to lunch break and it looked amazing. And since the ingredient list was incredibly short and beet root was something I haven't had in a while, I had to make it!!

I used her two basics and went a bit along what I felt would be great. Nothing fancy but it turned out so so so good!!!! Also, the portion lasted me three meals, so that might be a plus when you're making it!


You'll need:

  • 1 sweet potato
  • a package beetroot (I think it was about 400gr (~300-400)) 
  • 1 package feta (200gr)
  • 1 package cress
  • honey
  • salt, pepper and basil
  • olive oil and balsamic vinegar
  • pine kernels
What to do:

1. Peel and cut cour potato into medium chunks and cook until soft (~10min).
2. Cut beetroot into medium to small chunks.
3. In a bowl, mix sweet potato, beetroot, crumbled feta, pine kernels (You could roast those before, but I was too lazy) together.
4. Season with about 1 Tablespoon honey, olive oil, balsamic vinegar, salt, pepper and basil. Taste test here!
5. Sprinkle with cress! 

Voila!


I have to admit, it is super low key cooking. But I did cook something ;) 
And it lasted three amazing days!


Thursday, 31 July 2014

My first attempt at falafels

I just quickly wanted to hop by before I'm off tho the airport tonight and leaving for Africa. I made this recipe last week and it was so easy and fast, I needed to share it before it would fall into oblivion in the depth of my computer ;)

Homemade Falafel by Just a Taste

If you click at the link above, it will direct you to the original recipe. Down here, I'll just write down what I ended up with ;)

For appr. 16 falafels:

  • 2 cups cooked chick peas
  • 1 small onion
  • 1 garlic clove
  • 1 cup parsley leaves
  • 1/2 cup whole wheat flour
  • 2 teaspoons baking powder
  • chili, cumin, salt
Put all of the above into a food processor and mix until dough-like. I made the mistake here to start with my chickpeas and proceed with the lighter stuff on top. That, however, didn't mix well. Next time I'll be putting in all the light stuff first, and the chickpeas on top.
Let the mixture cool off for one hour in your fridge...or do it as I did and put it in the freezer for 6 minutes ;) (Yeah. I know. Patience is definitely not my thing).

Cover the base of a frying pan with oil and form little balls which you fry in your pan. After a minute or so, press them slightly into a more flatter form. Flip around and continue cooking until they're done.
If you follow the recipe link above, it will provide you with the instructions for a tahini sauce. 
We simply went for store bought hummus and yogurt, which  just tasted amazing as well ;)
And we also did fry up some egg plant and served avocado, arugula salad and cress at the side.

Enjoy! ;)
(And I'll be off doing some last preparations. Stay tuned for posts from Africa! :))

Wednesday, 30 July 2014

A walk back in history {or how I started baking}

Let's talk cake.
I sometimes try to remember when my baking addiction started. Admittedly, I haven't come up with something yet. But I like to think that it was all the way back, when I made my first cake out in our garden.

Back than, my brothers and I love to pretend we were living outside in out own cave (we had built one inside our neighbours trees....cough). Anyway, as a truly outside living person I had to make dinner for us, right? So while I was happily baking/cooking/mud-ing away I was suddenly facing the question: Why not steal inside and get real ingredients outside?! (I had to mull it over a bit, because I wasn't quiet sure if cave man have had flour back than, but than again, you were allowed to use what you had, right? And after all, some hunting and sneaking had to be done in order to get my game (aka: flour, sugar and salt)).

I had a rough idea about how to bake, at least I had seen my mother several times, throwing stuff into a bowl. So out there, in our cave, I recreated what I thought was a cake. The fact that it also had dirt, common daisies and grass in it, just made it even more appealing.
To shorten this whole story, I could convince my mum to actually bake my concoction and after I had applied a generous amount of chocolate to the top the whole family ate it together (they never found out about the grass, daisy and dirt part).

Several years later I still love to make messes bake, though I might have given up on the grass and dirt ;)
So, when I heard that my mum was having a slightly larger birthday crowd, I easily talked her into letting me tend to the cake part. How much I love her ;)

After a short facebook discussion, I came up with those two beauties:

The first one is a Chocolate Mousse Cake by diethood (though no worries, there is nothing diet-y about this cake!). And the second is the Amateur Gourmet's Strawberry Shortcake.

Since I had a pretty big crowd and never had attempted those recipes before, I mainly sticked to the instructions. However, here is what I changed:

Chocolate Mousse Cake

  • my cake pan was 'normal' sized which made the cake bigger but flatter. I was a bit concerned first but really liked it at the end, because this cake is really rich and the slices that we were able to cut that way had just the right size.
  • I skipped the hazelnut flavour which was just fine
  • Also, the cream for the center turned out just fine, when I attempted the outer vanilla cream, things just wouldn't work out. (If you look closely you can still see that under my nicely shaped...uhm....decoration is a layer of pretty flat not-creamy-at-all-cream underneath. What I sprayed on top then was a mixture of icing sugar, cream cheese, white chocolate and (here comes the genius!) wheat bran (weizenkleie oder gemahlene Flohsamen!). This will just turn anything into a spray-able form, is super healthy and close to not visible!!!
Strawberry Short Cake
  • I kind of overread that this recipe is so awesome because it actually makes two cakes (yeeeah I know). So we ended up with one pretty big cake. No harm was done ;)
  • I skipped the corn starch, which worked out, but if I would have had any, I would have used it!
  • The filling: I don't know what it is, but cream seems to avoid me. It just never works out. So, my filling and topping ended up slighty different. It was a mixture of 1 cup heavy whipping cream, icing sugar (again. haha) and a tiny bit of melted white chocolate. Worked wonders!!!
  • I drizzled some melted milk chocolate over the top at the end. This, however, is totally up to you ;)

I finally managed to label my cups accurately! (Before the baking process)
First cake base done, one to go
The beauty of cocoa and flour dust
And that's it. In total: AMAZING cakes (everyone agreed on that and they were gone at the end of the night) and totally manageable!! ;)

Happy and excited soon-to-be-eating-cake-friends. We had to hold them back so we could cut the cake properly...
....which my mum did a beautiful job on. And look at all this moist, soft, creamy, chocolaty cake goodness!!!
And this is me still piling cake on my plate in the middle of the night....after I probably already had more than my fair share of it :D
But you can never have too much cake, right?! So, happy cake baking to you all! :)

Friday, 11 July 2014

Vegetarian Burgers {some thoughts and what I've learned so far}

Recently, on another of our weekly cooking get together, we dived head first into the vegetarian burger ocean. Who knows why I hadn't done it before but I think there is some really really dim memory of mine where I had once tried my hand on vegetarian burgers (all the way back when I still lived together with my mum) and it had ended in a disaster....well, a veggie-something-stiff-fry-pan-dish disaster. So after that, I kind of never ventured back into that direction.
Turns out, four to five years later, vegetarian burgers are not only delicious!! but super easy to make!!!


The first time we made them we used this recipe (smokey sweet potatoes with roasted garlic cream and avocado) tweaking a bit, as usual, because we were either too lazy from some things or didn't have other things on hand. They turned out really great:


And if you start reading through all the 1.000 recipes that are out there, you notice pretty much, it just boils down to this:

--> You get a base, which is either white beans, beans in general, chick peas, lentils, sweet potatoes or potatoes. (you're base can also totally mix and match any of them together). You have something to keep it all together, normally 1 or 2 eggs and a bit of flour or oats (or both). Some other additions, such as onions, garlic, spinach, zucchini (can also be used as a bade, apparently), egg plants....whatever comes to your mind and spices to give it that special something.
Pile on a bun with any sauce and further veggies and you're done! (My kind of magic!!)


So, the next time I was at home, all by myself, and craving some real food. I threw together:

  • ~1/3 cup cooked chickpeas
  • 1/2 sweet potato (5 minutes microwave-cooked)
  • ~2 Tblsp whole wheat flour
  • 1 egg
  • arugula sala (about a hand full)
  • salt, pepper, a bit of garam masala and a note of curry
Mixed all of it together in a bowl and fried the patties in some olive oil in a pan.

I had them as a normal burger the first night, but they were also great on salad the next night.
Have fun getting creative ;)

I can't help myself...but isn't it pretty?! Vegetarian brugers are amazing! ♥


...though, now while giving this whole burger conversation a second thought, somewhere in the depth of my growing cook book should be a recipe hidden, written by my aunt (who cooks amazingly!!!) about white bean burger. They. were. amazing. My I should venture into that direction in the future, try to dig it out and share it here?!
We will see what my cook book reveals. Stay tuned and have a beautiful weekend!!

Thursday, 3 July 2014

Cooking together {featuring the Indian cuisine}

With one of my friends here I have this thing where we try to get together as often as possible to: cook. Than, life gets in the way, uni gets in the way, family and other friends...the list goes on and on, but we still manage to do it about once every other week. (Ok, and sometimes we also like to just head into the city and hit on the local ice cream shops and frozen yogurt places....buuut we still try our best ;)).
Anyway, just this week we managed to meet again in between our studying schedules and every time we do so, we normally try to go for something new. (Cooking for yourself somehow has the tendency to get quite monotonous. This is us learning and expanding our variety).


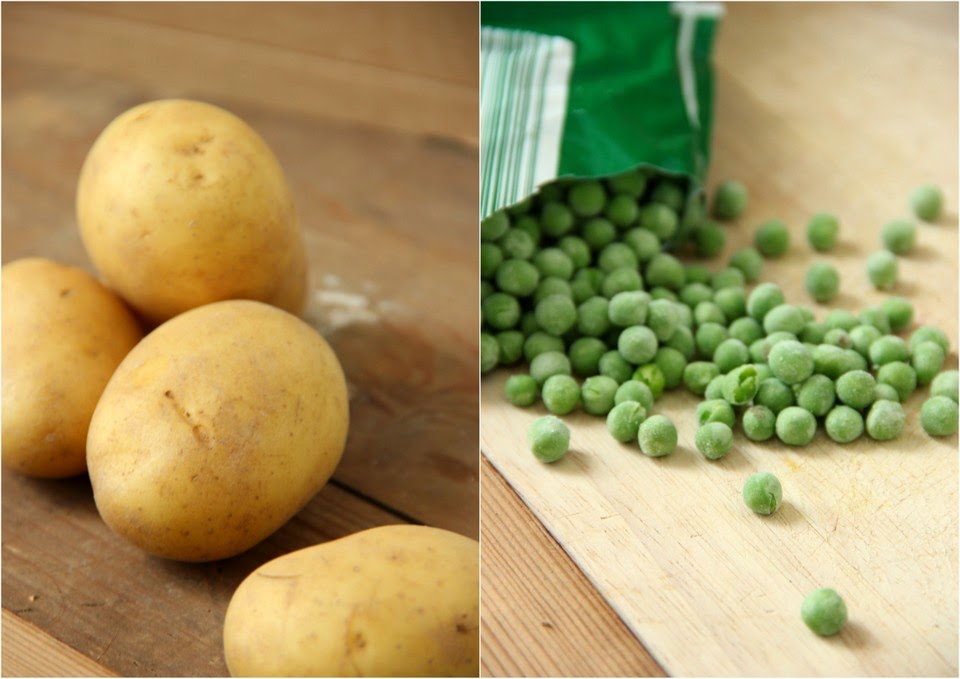
I had messaged her earlier this week with a list of things I was considering to cook number b) were spicy potato and pea parathas. She answered with "What are parathas?!". Needless to say we ended up making parathas.
So what are parathas?! Wikipedia said this: "a flatbread that originated in the Indian Subcontinent [...] Parantha is an amalgamation of the words parat and atta which literally means layers of cookeddough". (source)
(Also, I just noticed that Wikipedia spells them with an 'n'...the recipe didn't. So that's up for discussion).

If I would have to answer this question, I would say parathas are delicious flatbreads filled with spicy mush. Less intellectual I know. But look at this:


They were soft, and yummy. Spicy but sweet with the added chutney. They had just the right amount of flavour and the texture between the dough on the outside and the soft and chunky mush on the inside. In short: I loved them. And best of all: They really are easy to be make!!!!

Since my experience with the Indian cuisine doesn't go far when we talk about the cooking part, I will leave you with the original link (Katie at the kitchen door, spiced-potato-and-pea-parathas). Although, I changed a few things, so you'll find my changes here in between the pictures. Let's get rocking ;)

I started with the dough since the recipe wants to let it sit for 2 hours. I followed the recipe except that I simply used 2 cups whole wheat flour (no substitutional cup of any other flour). Easy peasy.

Next step: Prepare your filling!
While our potatoes were cooking, we threw together a quick salad.

And here come the changes I made:
They mainly happened because I didn't have everything on hand the recipe was asking for (ok close to nothing of it). So what I did was:
I still fried the onions with some olive oil in a pan. Than I added cumin, salt, curry, garam masala and simple semi hot mustard. And it tasted amazing!! (Though don't be afraid to add a lot of all of them. I kept adding and adding them simply because I normally just cook one-person-sized-meals and after all, those dishes live of their spices right?!) We kept sneaking bits and pieces of the potato mush while putting it into our flatbreads.


For the rest, we pretty much stuck to the recipe again. Which surprised us a bit was that the recipe had mentioned it would get quite messy so I was prepared to do a lot of cleaning afterwards. I wasn't!!!! The dough was super elastic and easy to handle. No big messes and filling spilling out!!!! (Added bonus!)

We served it with yogurt and mango chutney but I had the parathas cold with hummus the next day and that was just as delicious!!!


I hope I convinced you!!! Have fun in the kitchen ;)

Sunday, 25 May 2014

A one-woman-pizza {totally adaptable to the other gender as well ;) }

I love love love pizza. But, normally, living by myself, I can't really be bothered to start on the whole pizza making thing. So far, I had only made pizza for two or more, so the quantities would get used or I would freeze half of it. Now, I was one person and our (my roommate's and mine. She simply isn't here too often....just in case you were wondering about the 'our' ;P) anyways, our tiny freezer was preoccupied holding all the ice cream I normally feel like eating so freezing wasn't really an option. And also, this whole pizza business....I wanted something light!!

So, this is what I came up with. And it's amazing!!!!

This recipe is easy whipped up, perfect if you need to do other things besides cooking, it's healthy, crunchy, gooey, soft...it's perfect ;)

So what will you need? Start with making the dough:
Mix together in a small bowl:

  • 2 1/2 Tblsp hot water
  • dried yeast (until the surface of the water in your bowl is covered. I think it was about 1/3 of an average package)
  • ~3 Tblsp whole wheat flour
  • 1 Tblsp corn flour (polenta)
  • 1/2 Teasp sugar
  • 1/2 Teasp Tahini
  • a small sip olive oil
Knead  it all together and let it sit for 1/2 hour (I used the time for studying).
Roll your dough onto corn flour sprinkled baking paper and transfer it to the oven for 10 minutes at 170°C (Hot air).

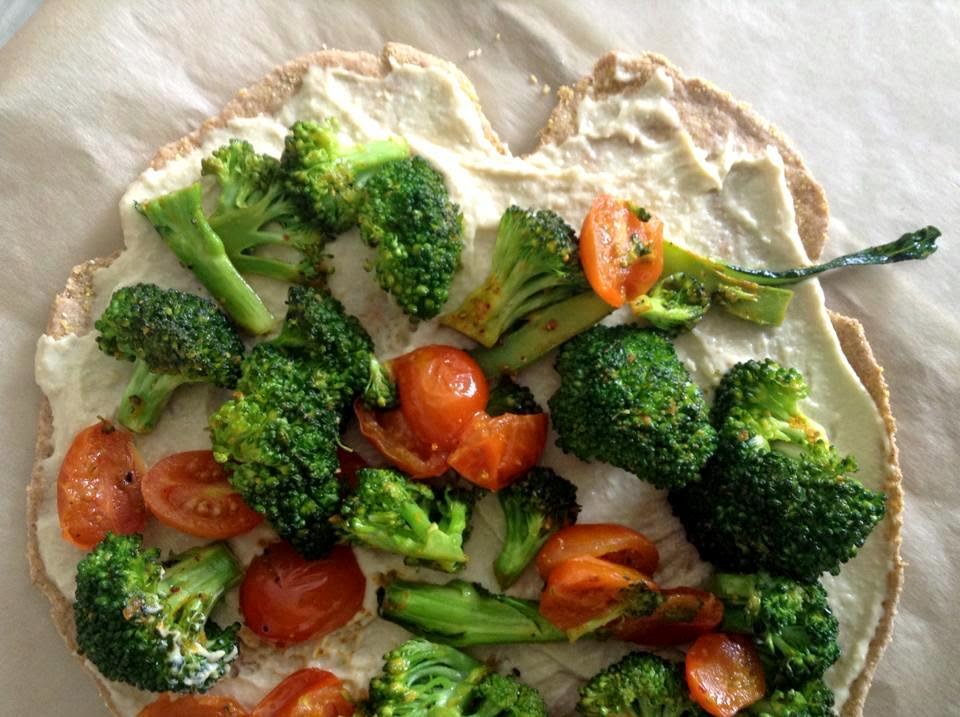
Meanwhile, fry with some olive oil: Whatever veggies you have on hand! I used 1/3 broccoli and ~8 cherry tomatoes. Season with salt, pepper and curry.

By now, your 10 minutes should be done.
Take your slightly baked pizza and....
Assemble the fried veggies on top of a hummus base!
Add another two slices of cheese and pop the whole thing back into the oven for another 8 minutes (or until cheese golden).
After those 8 minutes I also added 1/2 an avocado....and some spicy tomato sauce...but that might just be me ;)

And that's it! It really is easy once you get past that scary thought that this sounds like a lot of stuff to do! And it definitely made a better dinner than just bread (again). Enjoy!! ;)

Friday, 16 May 2014

Blueberry Banana Ice Cream

Oh sweet procrastination! But you know what's even weirder? When your real life stuff takes up so much time that there simply isn't any time left for the actual procrastination part. Which just happened to me this morning. Which just implies that I really need to sit down now and bury my head behind my books, which will happen immediately but not after I shared this quick recipe with you.

It is healthy, yummy, made in two minutes and the perfect interruption for any busy student, ...though if I think about it, its just really the perfect interruption for any living person...

..., anyways you will have to mix together inside a blender:

  • 1/3 frozen banana
  • ~1 cup frozen blueberries
  • ~1 large Tbsp no-fat Greek yogurt
  • ~100gr vanilla yogurt
Press the button and devour an amazingly tasty, smooth, silky and simply heavenly healthy ice cream while you keep on studying ;)

Sorry for the blurry phone picture...trust me this stuff is yum!!!
(Though, to keep it real....I just had a snickers ice cream for lunch! Healthy obviously doesn't happen every day, even around here ;))
TGIF!

UPDATE: Add another 1 or 2 after eight's. Its taking the whole experience to a completely new level!!! ;)

Tuesday, 25 March 2014

How to make pasta {a bucket list addition}

Did you know, that making your own pasta is actually super easy?! (Ok, if you have the right and proper machine. But given that it is super duper easy!!).
I spent a lot of time at my friends grandparents place recently and the whole family is obsessed with good food! Not in a crazy way, more in a really sophisticated, we-really-appreciate-good-food-way. I ate so good,  luckily I lost about two kilos while studying the month before, or I would have been a cute little stuffed piece of pasta myself.
Anyway, they don't juts eat good, they also cook and bake amazingly well, so one evening we made pasta.
People who know me better (or have read this little blog for a while) know how excited I get about everything food related. So reading and talking about all the different stuffing's we were considering putting into our ravioli...I probably would have already been satisfied doing just that.

But before we get too elaborated and into my crazy food-talk-obsession here, let's get back to the basic. The dough.
I was a little bit nervous when I ended up being the one tending to the dough and the machine (you know when you want to impress someone and you're more like "Whups,...never did this before. I guess we can cross out the impressing and just hope I don't end this in some embarrassing disastrous way!!??". That's where we were). And the dough after all, is the one crucial thing to good pasta (yeah I know. Quite obvious. So, can you feel the pressure already!?)

At the end it was just fun! (And a really good workout). So let's get started!!
For the dough you'll need:
  • 500gr flour (Typo 00 which is super important!!!)
  • 3 large eggs 
  • and 2 yolks
  • a pinch of salt
  • water for your finger tips
(Ok I hope I remembered it all right). I also did a little bit of research and just as usual, there are tons of different ways to make it. Use 6 eggs, 4 and 2 yolks, five...and so on. This is the one we used however.

Now, let's talk kneading:
  1. Built a little flour mountain. (This is probably the most fun part of the whole thing for me. It's like you get to be a kid again, building sand castles. And than everything gets awesome and messy. But maybe that's just me....yeah probably)
  2. Add the "mess". Aka eggs, yolks and salt.
  3. Now gently fold in the surrounding flour with your fingertips and start kneading.
  4. Occasionally dip your finger tips into the water and keep kneading! It will be a hard piece of work and probably seem impossible but you'll get there eventually. 
The book said to only dip your fingertips into the water (which meant: Don't add unnecessary liquid), though at the end we ended up adding quite a bit more liquid (which meant we kept dipping or fingertips into water quite often ;)) as usual in the kitchen: Just go with your guts.
Also, talking to my friends grandma while getting started, I totally forgot to add the yolks until a bit later....(cough. Talk about wanting to impress. She pretended just fine that she didn't see how I added them sheepishly later on. Thanks grandma!!).

Let the dough rest for an hour (at least) under a bowl (turned up side down).

And know you'll need the machine.

Start with the largest gap of the pasta machine and work towards the finest.
Start with a small piece, which you flatten with your fingers. Pull it through, fold it, pull it through again. When you go one way towards "finer", don't fold the pasta the first time you pull it through. Repeat ;)
I'm the officially (well, officially self-announced) pasta master now ;)

And that's about it! Now you can cut them into stripes, make lasagna with it or like, in our case, fill them with something delicious and make Ravioli! Nomnomnomnom!
(And this post got labelled "Bucket list" on a thought, because it seemed appropriate to put "Make your own pasta" on my bucket list!! ;) )

Also, I didn't take a single picture!! Bummer. I guess it was just too good to wait a single second longer until we could finally dig in. But, a friend of mine sent me his self-made pasta dinner the other day which used about the same technique and our second dinner looked pretty close to that. So you'll have to do with that ;)


To my friend: Sorry and thanks for letting me steal your picture, I hope that was ok  ;P

Have fun getting your kitchen all covered in flour!!!

Friday, 14 February 2014

Sweet potatoes two ways {The fancy 2nd}

Ok. Please, take a second in your busy day, read this post and then head out, buy a sweet potato (or maybe you're lucky and already have one at home? In that case you can skip the buying part) and make this dish! Do you have that, that sometimes there is this one dish you make (in like the period of a couple of month) and it just hits the spot?! This is what this dish is for me.
Please, please let me convince you! It's that good!!
Ok. After my rather weird kitchen-obsession-rant, we might actually get to the really interesting part.

So, as I just had prepared my sweet potatoes the easy way yesterday (well the day I wrote this...than exams hit), I had still leftovers. So obviously, I needed to come up with something for those. I wanted a main-meal-like thing, not too heavy though (I'm studying and there is nothing that stops you more than heavy food, trust me....along the line of so much more but that's a different story entirely), balanced considering the nutritional side (Fibres, proteins, vitamins...) and tasty. Oh, and it wasn't supposed to take for ages, obviously.
So here is what I came up with (again, I had a dish from the Naam in my head while creating my lunch):


Sweet potato tofu bowl with a sesame-ginger dressing

Can I just quickly interfere and say: It is sososososooooo good! Make it!!!!...just sayin'...
Anyways, if you want to (and you want to, trust me. Okok, I'll stop), you'll need:

For the sauce, 1 serving:
  • 1 small piece of fresh ginger (about 1cmx0,5cm) (Or, even better if you have it on hand, ginger paste)
  • 1 Teaspoon cream cheese (mine was with goat milk)
  • 1 1/2 Tablespoon soy cream
  • 1/2 Teaspoon Tahini
  • 1/2 Teaspoon mustard
  • herb salt and pepper
  1. Cut the ginger as fine as possible (you don't want those sudden really intense ginger tasted bites!!)
  2. Mix all of the ingredients in a bowl and mix.
  3. Season with the herb salt and the pepper. Make a few variations if needed.
For the bowl:
  • 1/2 a oven baked sweet potato
  • ~ 50gr smoked tofu
  • 1/3 of an avocado
  • cress
  • cucumber (or any additional veggies)
  1. Heat up the tofu and the sweet potatoes (I used my microwave which, admittedly isn't that great, if you have more patient, time and an oven(!) on hand, you could use the oven to make it more healthy! (and add a nice crisp to the potatoes!)).
  2. Throw together the tofu, sweet potatoes and peeled and cut avocado. 
  3. Top with your sauce and add some cress.
  4. Serve with cut veggies on the side.
  5. Enjoy!!!!!!!!!!!!!!!!!!!!!!!!!!!!!!!!!!!!!!!!!!!!!!!!
This left me feeling perfect, not too full and satisfied and it really tasted amazing!!! Some fresh fruits and a tiny bit of chocolate for desert ;)
(Oh, and the second, and third, and...aehm yes, anyway. All those times after that I also added a layer of cheese before putting the sweet potato fries and the tofu into the microwave. It added an extra source of protein and so much yummy cheesiness!!!


There go my two ways for sweet potatoes. Blimey, there are so many more...but it's a good start I'd say ;)

Monday, 3 February 2014

Sweet potatoes two ways {The easy one}

I'm a huge fan of sweet potatoes ever since the first time I tried them out two years ago in Vancouver I can't stop buying them from time to time. Just on the side, sweet potatoes are low in sodium and saturated fats, and a good source for dietary fibre, Vitamin B6, Vitamin A, Vitamin C, Manganese and Potassium (source). (If nothing of those say anything to you, they didn't really to me ;), Vitamin B6 for example is important for your metabolism especially to incorporate and convert protein. It is a lot included in meat and fish, so this is a good substitute for vegetarians! But it also it's in most of the green vegetables source. Vitamin A is good for your skin, cellular growth and your eyes source and the rest you'll have to goggle by yourself ;) ) Anyway, hence the whole studying going on right now, I needed a quick lunch fix, so this happened:


I started with peeling and cutting my sweet potato:

Next, the whole thing got thrown into a plastic bowl where I added olive oil, sweet pepper powder, Provencal herbs, salt and pepper. I gave the whole thing a good shake.

This than, made it into a oven form, lined with baking paper, and stayed in my microwave-oven for about 45 minutes at 170°C hot air, or normal 350°F if you have a really and proper oven.
Some studying might have happened in that time.

Right during the last 5 minutes, I cracked upon one egg, mixed it with some milk and herb salt and scrambled the whole thing up, in my beloved (and only!) frying pan.

Swiftly cut up some fresh cucumber (the green always adds something to every dish!), and voilá!

You have an easy, healthy, decent dish :) Oh and at the end I also spread curry ketchup over the whole thing because I'm going nuts over it. But it a) doesn't look thaaat pretty and b) I know, it's not that healthy. Oh well ;)
(My sweet potato, part 1).

Oh, and to no ones special interest: That was my desert ;)