Saturday 28 September 2013

Another Saturday {My last Saturday at home. 6 days countdown}

It's my last Saturday home while still living in this city. It's weird, I haven't really wrapped my mind around it, I've been home at so many places already and have a second 'home' on the other side of the earth but right now, I'm just content, calm and surprisingly...happy.


One last tradition-Saturday. There will always be 'lasts' in our life but there will always also be a lot of 'firsts' to look forward too.

Friday 27 September 2013

Eat a chocolate cake with a spoon {or my fingers. A bucket list post}

Ok before I start saying anything I have to say: This. Is. The. BEST. Cake. I. Ever. Had/Made. EVER.! Do I have your attention? Thank you!


So, with everything that was coming up recently, it just felt right to tackle that point on my bucket list. I don't know when I had started to dream about eating a whole cake with my fingers (or just a fork) but I guess it's some time by now (haha is that weird?). In my mind, it always was a romantic night with my boyfriend, it was smelling heavenly of  freshly baked chocolate cake and in the spur of the moment we would dig in the cake with just our forks, not bothering to cut pieces and ending up having our faces covered in chocolate icing, cake crumbs and huge smiles. That combines quite a bucket of cheesy, doesn't it? Well, sometimes, I have to admit, I do like it cheesy.
So since the whole thing didn't seem to happen that way, I decided I would take a step and help fate a bit. And who else, but some of my closest friends could be just as good to savour this whole cake-point. And with this Thursday also being our 'last' girls evening (we're talking of years and years of Thursday-traditions!!!!) it was more than appropriate.
Therefore, when I stumbled across this recipe, I just knew it was perfect. I love (no wait, is there something stronger than love? In case you come up with something, insert it here!) chocolate. And I also love coffee. So the combination of a chocolaty-coffee-ish cake base, the chocolate mouse centre/layer and the lighter milk chocolate frosting, could it get any better?!

Except for a few subs of things and tiny changes, I didn't have on hand, and the fact that I divided the recipe in half (I wanted a smaller and more compact cake) I pretty much stayed with the original recipe. Head over here (the recipes are a-m-a-z-i-n-g!!!) for the original version or read on for my to-gram-translated-cut-in-half-and-substituted recipe here.

For the cake base (1/2 of it)
  • 42gr butter
  • 85gr sugar
  • 1/2 flask (those tiny German ones) vanilla essence
  • pinch of salt
  • 85gr flour
  • ~1 'heaped' teaspoon baking powder
  • 25gr cocoa powder
  • 1/2 cup coffee
  • 1/4 cup buttermilk (substituted by milk mixed with lemon juice)
  • 1/4 cup sour cream (substituted with cream cheese)

  1. Preheat your oven to 350°F/ 180°C
  2. Beat together butter, sugar, salt and vanilla essence until light and fluffy.
  3. Add flour, baking powder and cocoa powder.
  4. Soften again with the coffee, the buttermilk and the sour cream.
  5. Put in for 35-40 (I needed 40) minutes and test with a wooden tooth pick.
  6. (Can you tell I go easy with the whole cake-batter-mixing-rules haha).

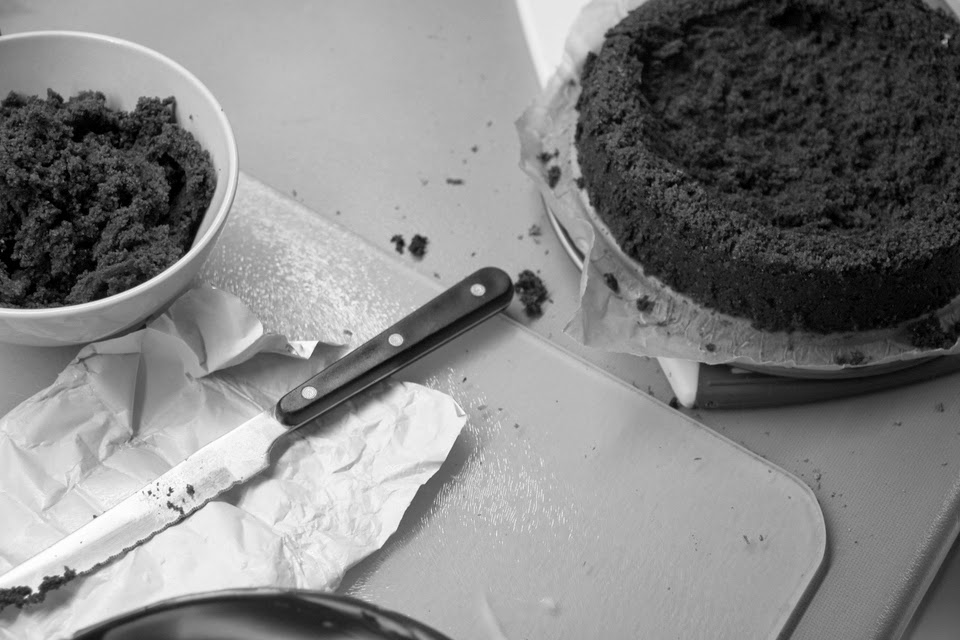
The cake was easily thrown together and I made it the day before so that I would just have to assemble the rest with the creams. Yeah, right. "Just".
My cake base the evening before 'the day' ;P (and yeah, you can totally see all my test-poking-holes haha).

For the chocolate mousse 
I completely followed the recipe here, so I'll provide you with only the link again. 
A few side notes: This included a lot of beating/mixing. Also, somehow I think my mousse didn't had the right consistency at the end, though it still worked and for sure tasted amazing. I think it might be that my honey as well as my chocolate weren't as hot as they might have needed to be. (?)

The kitchen in between. Quite a mess....
For the frosting adapted from Martha Stewart's Milk Chocolate Frosting
This is slightly adapted because a) I somehow switched of my brain while I divided the recipe into thirds (my experience with Martha Stewart recipes is, that they always make more than plenty. My 1/3-version still left me with left overs!)  and used my 3/4 cup instead of my 1/3 cup (my frosting ended up with a slight amount of more sugar *cough*) and b) I didn't have any sour cream nor cream cheese! I went with no-fat curd...which worked surprisingly well (probably because it balanced out all the sugar).
  • 140gr milk chocolate
  • 3/4 cup sugar
  • pinch of salt
  • 160gr butter
  • 2 1/2 tablespoons curd (Quark)

  1. Beat together butter, salt and sugar until light and fluffy.
  2. Add the melted chocolate and the curd. 
  3. Beat again until light and fluffy.

So. This was not just the best cake I ever had/made but also the most time consuming. It actually wasn't as complicated as I had feared but the three different batters, plus all the different melted and separated ingredients just made up for quite a lot of dirty dishes. Definitely a special-occasion-cake but don't be shy! This is totally manageable!!!
Oh, I also didn't go with the 'diamond' shaped centre form because it just didn't appeal to me. I simply cut of the top, hollowed the rest of the cake, filled in the mousse and put the top back on. After that, cover everything with icing ;)


And let me tell you, eating a cake without cutting, just with your forks and fingers is amazing!!!!
(Btw: This was a once-in-a-lifetime thing, so I might actually have eaten chocolate cake until I got sick that evening. Whupsa...but so worth it!)


And this is what was left afterwards for future-mixed-deserts. If you have questions, don't be afraid to ask :)

Tuesday 24 September 2013

Quick breakfast {Nectarine and sour cream toast}

I'm super exhausted from an extra long day at work so we'll keep it light and short today.
This is what I had for breakfast recently (another day I wasn't feeling like muesli!!) and it's one of the fastest, tastiest and easiest things I know to make!!
Originally I had it for the first time last year on our vacation in France and wanted to make it since than. They used fresh figs back than which was awesome (not just tasting awesome but looking amazing with the purple/red from the flesh, the yellow/white/green from the skin and the rich purple/blue from the outside. Haha yeah I get way too excited about colours I know) but since I didn't have fresh figs on hand, I went witch nectarines which worked just as well.


Nectarine sour cream toast
You'll need:
  • Sour cream
  • An English muffin or any toast
  • 1 fresh nectarine
  • honey
  1. Spread your toast with sour cream.
  2. Slice your nectarine and out it on your toast as well (just typing this makes me think, roasting the nectarine before should be amazing too!!!)
  3. Drizzle some honey on top.
  4. Enjoy ;)

And now I'll be off to do great and secret things (or maybe, just go to bed early). Enjoy your Tuesday ;P

Monday 23 September 2013

Old good things

One day from my weekend: The Saturday market...

...quite coclorful :)

Saturday 21 September 2013

Breakfast omelets two ways

This might just be the perfect weekend food post because, there simply is nothing better than sleeping in on lazy weekend days and than starting the day with an awesome, energising and yummy breakfast. Don't you agree?
So, we're talking food again. Jep. Breakfast food. As a loyal reader (or just a close friend of mine haha) you might have noticed that I have a slight obsession with muesli for breakfast. Ok. Asking my friends, it's not an obsessions, it's an addiction...I'll leave that open for discussion.
I'm also definitely that kind of person that likes a hearty breakfast from time to time. And with that: We're talking omelet.

I love that omelets make it so easy to have this huge variety of food options. You can really have them anyway you could think of! That morning I needed something to wake me up and keep me going for the day, a good healthy base to built in all my little nasty treats later on ;)

Breakfast omelets, two ways

 1.) Jo-style
You'll need:

  • 2 eggs
  • 1 tablespoon sour cream
  • 1/2 teaspoon flour
  • 1 sip milk
  • salt
  • pepper
  • cheese
  • Filling (I used: Spinach, mushrooms, onion, tomatoes, ham, hummus)
  1. In a bowl: mix the flour with the milk until it has a creamy consistency (doing this first will prevent the flour from getting clumpy)
  2. Add the eggs, sour cream, salt, pepper and cheese and beat well with a fork.
  3. In a pan: Sautée the onion. Add the mushrooms and, later on, the spinach until everything is well done. Toss in the tomatoes last to give them only a bit of the heat but don't let them fall apart entirely.
  4. Meanwhile, with a bit of oil, start making your omelet. Pour your egg mixture into a pot on medium heat. Cover with a lid. Wait until the mixture has set. Occasionally, make sure that your omelet is not sticking to the pot bottom. Flip at the end and let the other side brown a bit too.
  5. On a plate, assemble all of your ingredients (I spread hummus on top of the omelet, dump all the other stuff on it and 'closed' the omelet. I also had more hummus on the side. You can never have enough hummus right?!) 
  6. Enjoy ;)

2.) Jeremy-style
Your omelet base will be the same, simply use two more eggs.
For the filling, go with more ham and onions and less spinach. No mushrooms and no tomatoes. Also, while your omelet is cooking: Sprinkle cheese on top and let it melt. At the end: Sprinkle with pepper and hot sauce. Enjoy :)

For the first picture, Jeremy took the omelet out of the pan to let me take a "pretty" picture. But the eggs wasn't really cooked yet, so he put it back and "messed" it up. He knows my obsession for food pictures. Though I think there's nothing wrong with the second picture outcome, isn't there?! ;)
All in all, that made for two really really yummy and filling omelets. Have fun cooking and a wonderful weekend to everyone!

Friday 20 September 2013

When two compromise on a Pizza

Here we are. Talking food again. Of course ;)
So, when Jeremy and I decided on some serious (cough) cooking at home, it definitely had to include pizza somehow. I mean, seriously, it's pizza! Who doesn't love pizza!? (and maybe maybe it's also, that I have a slight pizza obsession? Who knows?!) So, when we started planning I had this (in my mind) awesome bacon, egg and avocado pizza floating around (we still had leftovers of all the three things, which had to be used) but on the actually day, we already had consumed most of the things including quite a large amount of bacon during the last day so, at the end....it just had to be something else. Talking pizza can get quite serious, can you tell?
We finally ended up on this awesome outcome, making compromises while we went (each trusting the other a bit while cooking ;P)
This pizza has a white Alfredo garlic sauce as a base, on a light and fluffy oregano/garlic pizza dough, topped with slightly sauteed spinach, onions, ham, cheese and eggs. It really can't get any better!
(And sorry for the light in these pictures. Cooking just always happened to a time where light wasn't really available anymore...)


For one pizza loaded full with awesomness
You'll need (btw, this made enough for two dinners for two , so I guess that makes a total of 4 servings):
  • One serving pizza dough (see below)
  • Garlic Alfredo pasta sauce (store bought)
  • 300gr ham
  • One package fresh baby spinach
  • 1/4 large onion
  • 3 eggs
  • 1 package Italian pizza cheese
  • optional: avocado

For the pizza dough I went with this recipe by 'A beautiful Mess'. Over the years I've tried many many pizza recipes and never found the one where I would have said: "That's it!". I think I found it now! The recipe is enough for (I'd say) three large round pizzas. We made one baking tray but it was plenty of dough.
What I love about it, it's it's fluffy-ness, the added flavour from the oregano and garlic and just how simple it was two make. It took me 5 minutes at all to mix, knead and put aside. That one is a keeper!
(The only changes I made were, that I only had white flour on hand. Though next time I'll definitely experiment with whole wheat for a healthier option).


  1. Prepare the pizza dough and set aside. Go shopping for the other ingredients ;)
  2. Preheat your oven to 400°F and put in the rolled out and with butter and garlic salt sprinkled dough for 5 minutes.
  3. Take out. Know apply all your ingredients.
  4. We slightly sauteed the spinach and added some garlic spice before it went on the pizzas. Otherwise, or order was: Spinach, onions, ham, eggs and cheese.
  5. Bake for appr. 25 minutes or until golden brown.
  6. Serve with the freshly sliced avocado and fresh pepper on top. Enjoy!

Note: This makes for one heavy loaded pizza! Jeremy and I had a short discussion over how much ham actually had to go on top. I was for a good look (and maybe a less calorie and healthier version *cough*) but since he trusted me on the eggs, I trusted him with the ham. Turned out just perfect ;)
For the ham: We used rosemary and black pepper ham. Just see what you'd like to try out!
For the eggs: Simply crack the eggs on top. They will be perfectly cooked at the end.
And: This pizza is even good cold(!)

Monday 16 September 2013

Weekend Wrap Up

The weekend was...lazy for the most parts. But full of the good kind of lazyness.
I dyed my hair darker (finally).
I went for a first walk in my new shoes
and a first run shortly after that.
I met good friends and talked a lot.
Catched up with other just as important people.
Still couldn't find an apartment.
Cleaned a bit.
And finished my book.
...oh and wrote more to-do lists for the coming week. The usual over here ;)


I simply love foggy walks. Listening to Mumford and Son's "Babel" album...

My new and darker hair. I'm relieved I like it this much. And now the spell is broken and will be able to dive head first into some color testing over the next months!
And someone was definitely happy to get back into her running. Running pre- and after-me.
With that I'll leave you with the promise to post about pizza recipes next. Have a relaxing start into your week! :)

Wednesday 11 September 2013

Tomatoe-Chickpea Hummus {a hummus story}

I had planned to post another recipe first but since I feel like this is rather a summer post and, sadly, summer is definitely coming to an end now, I thought I might just sneak this in before. So here we go!


I have to start with saying: I love Hummus. Seriously. I could eat it all the time. But, and here's the thing, I tried so many times to make my own hummus and it never really turned out in a way that I would be proud to share the recipe or tell anyone in the first place that I tried to make hummus again. (It gets kinda embarrassing). Maybe it's because I never used tahini (it's something I just don't seem to be able to find) or maybe it's our food processor, who knows!?
So the other day (weeks and weeks ago ups), I thought if I couldn't get a 'normal' hummus right, I might just would have to do it the not so normal way (the messy, unusual, Jo-like one. Duh). And may I say so, it turned out pretty good. Guess, we'll just stick to messy around here.

For one one-person-sized tomato hummus, you'll need:
  • half a can of chickpeas
  • two slices dried tomatoes (those that are preserved in oil)
  • 1 large Tablespoon non fat Greek yogurt
  • 1 Tablespoon cream cheese
  • salt&pepper
  • optional: Fajita spices to sprinkle on top
Put all of the above into a food processor and process until it reaches the preferred consistency (and adjust it to your taste preferences with salt and pepper!). Easy peasy!
Serve it with either crackers or raw veggies...or top a salad with it! And I think this might just be the start of an addiction. I mean, stuffing things into a food processor and getting something that awesome and healthy (and easy!!)!? The options are endless! Avocado, beans, yogurt, eggs, greens, potatoes...omg. Yeah. I'm addicted.


And to no ones special interested: Right after I short the pictures, I dug in and enjoyed the thing all by myself not having to share with anyone. Ups. Didn't just say that!
And isn't it funny how hummus already got the 'hmmmmm so yummy' in it! haha go figure.


...also, that picture just makes me notice how pale I was all the way back. Summer definitely did a good job this year considering my tan. Jeez. I'll be back to pale and white in no time though...


Enjoy ;)
Oh, and next time I'm going to attempt those Chickpeas instead of the store bought cans. Tschaka!

Monday 9 September 2013

Busybusybusy...

I wish this constant state of busy would change for once. I. Need. More. Time. Desperately. 
Anyways, I actually did find some time Friday evening to say goodbye to a good friend of mine, spending the evening with her one last time (for any time soon at least). 
We did it with style!

With a self made picnic!
And late swimming dips
And lots and lots of talking and updating 
Tomato-mozzarella-feta-corn-salad
And a beautiful beautiful sunset

Now, back to reality and work! Here we go.