
Anyway. If you too, love some changes from time to time and you do happen to have a sewing machine at home (though doing this by hand would also work...it just sorts of kills the time factor), this is an easy tutorial you might want to try out. (Though a certain messy factor is still in, as it is in all my projects. Figure).
And what I nearly forgot to mention, this is a pillow case you can easily remove, wash and put on again! Yay for that!
Easy peasy pillow covers

You'll need:
- fabric(s) of your choice
- something to sew
- scissors or a fabric cutter
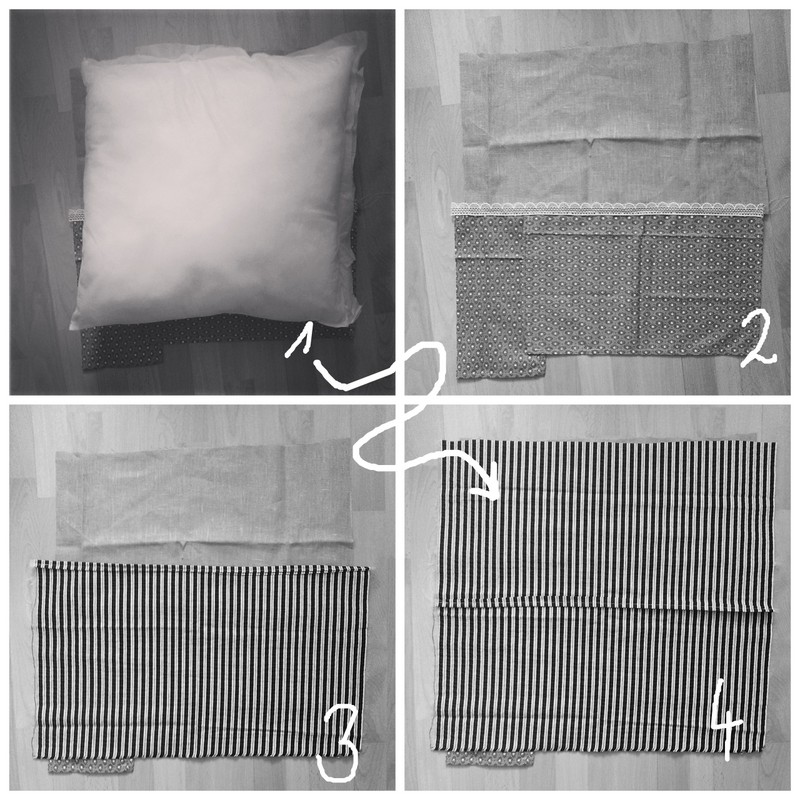

- For the front: Cut one square (or any other form) piece of fabric, matching the shape of your cushion.
- If you're using several fabrics just, make sure your 'final piece' matches the cushion as well. I used two types, plus some lace ribbon I had left (and yes my one fabric is cut into two pieces, that's because the original piece wasn't big enough. And I don't mind messy as you know ;) ).
- For the back: Cut out two pieces. They have to overlap each other (picture 3 and 4) and match your cushion again.
- All the pieces are laid right side on each other (so: The side that's going to be on the outside). For your two overlapping pieces:
- For the one that lays under the other (picture 3) seam the one side that's not on the outside (I think you can see it already seamed in the picture), by folding the border double (2nd picture of the seam pictures above). This one is going to be on the 'outside'.
- For the pieces that goes above in the layers: A simple seam with one folding (1st picture of the one above) is enough, as this on will hide behind the other one.
- You're still with me? It may sound a bit complicated but it really is easy. Trust me! And you're nearly done!!
- Having all your pieces, laying on top of each other, right side together, sew once all around the square.
- Cut the 'left over' fabric and turn inside out, using the hole made by the two layers.
 |
| Pretty messes |
And just while writing this I stumbled upon another really cute pillow tutorial over here at A beautiful Mess .
 |
| Oh, and yes. The two tiny cushions in front, are still waiting for their covers. For now they'll have to go with plain blue haha. |
No comments:
Post a Comment